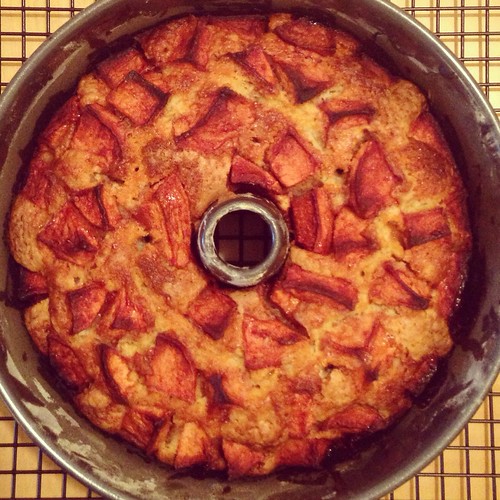
Jewish Apple Cake
 Print This Recipe
Rosh Hashanah at my parents’ house means at least 15 people (we used to have around 50!) over for dinner. And each year, I try to make something new, but usually end up with my old favorites. Since we had such a small group this year, and I didn’t have to make a gazillion different things, I decided to go with a new recipe for apple cake.
On Rosh Hashanah, you wish your friends and family a happy and sweet new year, and apples (dipped in honey) are a traditional food, as is apple cake. This recipe by Deb’s mom is definitely sweet and made everyone happy. In fact, a couple of guests told me this is one of their favorite things I have ever baked. It’s super moist, and that was even after making it ahead and freezing. And an added bonus: It’s made with oil so it’s so dairy free.
Ingredients
6 apples (I used Fuji)
1 tablespoon cinnamon
5 tablespoons sugar
2 3/4 cups flour, sifted
1 tablespoon baking powder
1 teaspoon salt
1 cup vegetable oil
2 cups sugar
1/4 cup orange juice
2 1/2 teaspoons vanilla
4 eggs
Preparation
Preheat oven to 350 degrees. Grease a tube pan. Peel, core and chop apples into chunks. Toss with cinnamon and sugar and set aside.
Stir together flour, baking powder and salt in a large mixing bowl. In a separate bowl, whisk together oil, orange juice, sugar and vanilla. Mix wet ingredients into the dry ones, then add eggs, one at a time. Scrape down the bowl to ensure all ingredients are incorporated. (My batter was really thick at this point. Don’t panic.)
Pour half of batter into prepared pan. Spread half of apples over it. Pour the remaining batter over the apples and arrange the remaining apples on top. Bake for about 1 1/2 hours, or until a tester comes out clean.
Recipe from Smitten Kitchen.
Apple Tart with Salted Caramel
 Print This Recipe
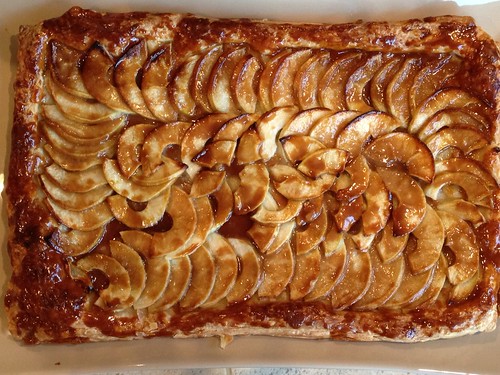
I first made this tart for an office Thanksgiving potluck so I could test it out before Thanksgiving and it was an enormous hit. Everyone was raving about it and asked for the recipe, which is always a good sign. Because it uses packaged puff pastry, it’s pretty much no-fail, and super quick to whip up.
I kept calling the tart “rustic,” because while the quasi-mosaic part is pretty, the crust isn’t exactly picture perfect. But what it lacks in looks, it definitely makes up for in buttery, flaky, salty, sweet goodness.
Note: I used one package of Pepperidge Farm puff pastry and put the two sheets on top of each other before rolling.
Tart Base Ingredients
14-ounce package puff pastry, defrosted in fridge overnight
3 large or 4 medium apples (about 1 1/4 pounds)
2 tablespoons granulated sugar
2 tablespoons unsalted butter, cold, cut into small bits
Salted Caramel Glaze Ingredients
1/4 cup granulated sugar
2 tablespoons unsalted butter (or salted, but then ease up on the sea salt)
1/4 teaspoon flaky sea salt (or half as much table salt)
2 tablespoons heavy cream
Preparation
Heat your oven to 400°F. Line a rimmed baking sheet or jelly roll pan with parchment paper. Ideally you would use a 10×15-inch jelly roll pan. A smaller pan will make a thicker tart (and you might need fewer apples).
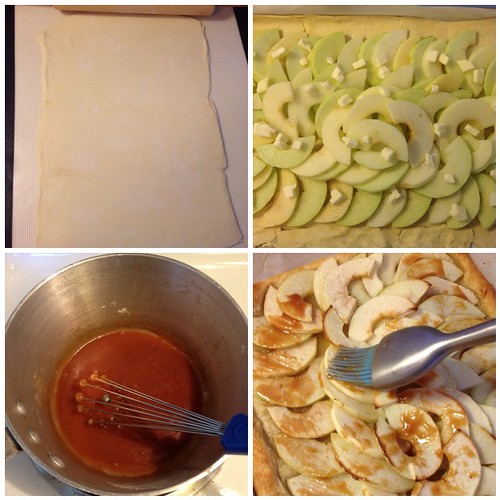
Lightly flour your counter and lay out your pastry. Flour the top and gently roll it until it fits inside your baking sheet, and transfer it there. If you roll it bigger, just trim the edges.
Peel, core, and slice the apples. (Deb suggested using a mandolin but I used one of those all in one peel/core/slice thingies and it worked just fine.) Leaving a 1/2-inch border, fan the apples around the tart in slightly overlapping concentric rectangles — each apple should overlap the one before so that only about 3/4-inch of the previous apple will be visible — until you reach the middle. Sprinkle the apples evenly with the first two tablespoons of sugar then dot with the first two tablespoons butter.
Bake for 30 minutes, or until the edges of the tart are brown and the edges of the apples begin to take on some color. If you sliced your apples by hand and they were on the thicker side, you might need a little more baking time to cook them through. The apples should feel soft, but dry to the touch. If your puffed pastry bubbles dramatically in any place during the baking time, simply poke it with a knife or skewer so that it deflates.
Meanwhile, about 20 minutes into the baking time, make your glaze. In a small saucepan over medium-high heat, melt your last 1/4 cup sugar; this will take about 3 minutes. Cook the liquefied sugar to a nice copper color, another minute or two. Off the heat, add the sea salt and butter and stir until the butter melts and is incorporated. Add the heavy cream and return to the stove over medium heat. Cook, stirring constantly, until you have a lovely, bronzed caramel syrup, just another minute, two, tops. Set aside until needed. You may need to briefly rewarm it to thin the caramel before brushing it over the tart.
After the tart has baked, transfer it to a cooling rack, but leave the oven on. Using very short, gentle strokes, and brushing in the direction that the apples fan to mess up their design as little as possible, brush the entire tart, including the exposed pastry, with the salted caramel glaze.
Return the apple tart to the oven for 5 to 10 more minutes, until the caramel glaze bubbles. Let tart cool complete before cutting into 12 squares.
Recipe from Smitten Kitchen.


