Salted Chocolate Chunk Cookies
 Print This Recipe
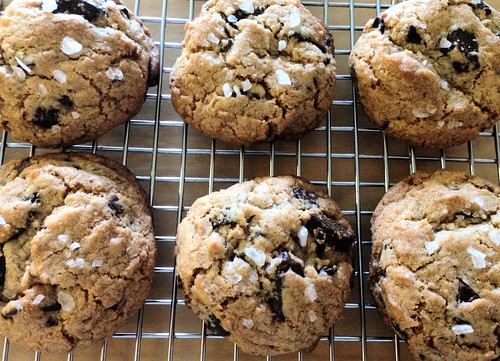
The minute I saw this recipe pop up on Facebook, I knew I had to make these. Chocolate chunks and sea salt–you can’t go wrong with that! I followed Deb’s instructions, except since I’m super lazy and hate chopping chocolate, I used the Trader Joe’s semi-sweet chocolate chunks. They were the perfect size, and since you’re not using the entire bag, it’s ok if you sneak a few pieces. Also to note: Deb mentioned her dough was really crumbly; mine wasn’t, but if yours is, don’t panic–she swears they will turn out just fine.
While these cookies are soft and delicious (and I managed to eat more than one while they were still warm), I still prefer the David Lebovitz recipe. But if you’re looking for a quicker recipe that doesn’t require chilling dough overnight, this is it!
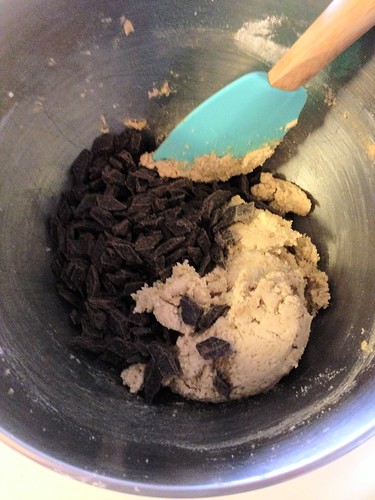
Look at that ratio of chocolate to batter!
Ingredients
1/2 cup (4 ounces or 113 grams) unsalted butter, at room temperature
2 tablespoons (25 grams) granulated sugar
2 tablespoons (25 grams) turbinado sugar (aka Sugar in the Raw; you can use more brown or white if you don’t have this, but the subtle crunch it adds is delightful)
3/4 cup plus 2 tablespoons (165 grams) packed light or dark brown sugar
1 large egg
1 teaspoon vanilla extract
3/4 teaspoon baking soda
Heaped 1/4 teaspoon (or, technically, 1/4 + 1/8 teaspoon) fine sea or table salt
1 3/4 cups (220 grams) all-purpose flour
1/2 pound (225 grams) semi- or bittersweet chocolate, cut into roughly 1/2-inch chunks with a serrated knife (I am lazy and used the Trader Joe’s chunks)
Flaky sea salt, to finish
Preparation
Heat oven to 360°F (180°C) and line a baking sheet with parchment paper or a silicon baking mat.
In a large bowl, cream the butter and sugars together with an electric mixer until very light and fluffy, about 5 minutes. Add egg and vanilla, beating until incorporated, and scraping down the bowl as needed. Beat in salt fine sea or table salt and baking soda until combined, then the flour on a low speed until just mixed. With a spatula, fold/stir in the chocolate chunks.
Scoop cookies into 1 1/2 tablespoon (I used the medium OXO scoop) mounds, spacing them apart on the prepared baking sheet. Sprinkle each with a few flakes of sea salt. Bake for 11 to 12 minutes, until golden on the outside but still very gooey and soft inside. Out of the oven, let rest on baking sheet out of the for 5 minutes before transferring a cooling rack.
Recipe from Smitten Kitchen.
Confetti Sugar Cookies
 Print This Recipe
Last month, I made about 300 balls of cookie dough to be baked off while I was in San Diego for my sister’s wedding. I bought personalized stickers and cute little treat boxes off Etsy, and filled them with homemade cookies for all of the guests to take home. Aside from my tried and true brown sugar cookies and speckled shortbread with sea salt, I decided to try something a little more colorful, hence this recipe.
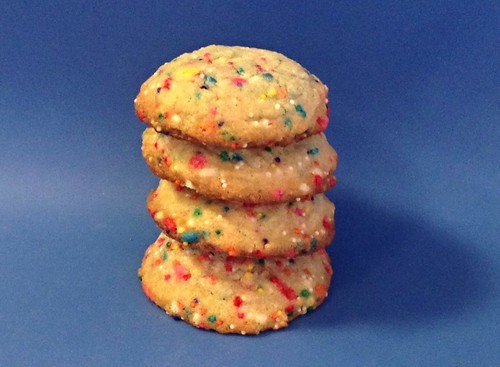
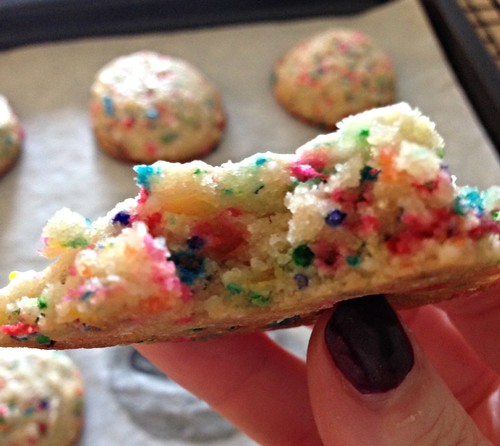
I couldn’t have been any happier! Of the three cookies, I think these were the crowd favorite, and they were so festive and happy, you have to smile just looking at them. Thick and chewy, with a nice crunch from the round (nonpareil) sprinkles, and loads of color from the cylinder sprinkles, these cookies are delicious and pretty!
Ingredients
1 1/3 cup butter, room temperature
1 1/2 cups cups granulated sugar
2 eggs
2 teaspoons vanilla extract
3 1/2 cups flour
1 teaspoon baking powder
1 teaspoon salt
3/4 cup sprinkles
Preparation
Preheat the oven to 350 degrees. Line a baking sheet with parchment paper.
Beat together the butter and sugar until light and fluffy, about 3 minutes with a stand mixer. Beat in the eggs and vanilla until very well combined.
In a small bowl, combine the flour, baking powder, salt, and sprinkles. Gradually add the flour mixture to the butter mixture and mix until combined and the dough comes together.
Use a cookie scoop to drop balls of dough on the prepared baking sheet, about 1-inch apart. Bake for 11 minutes or until edges are turning golden and tops are just slightly underdone looking.
Cool for 10 minutes on the cookie sheet before transferring to a cooling rack to cool completely.
Yields 4-5 dozen.
Recipe from Buns In My Oven.
Lemon Pound Cake with Lemon Essential Oil
I love lemon pound cake, and the more lemon juice or zest, the better! So when my friend Leah asked if I was interested in baking something and including an essential oil, I immediately said yes to the lemon oil! The oil is cold-pressed from the rinds of lemons, so it smells absolutely amazing and adds even more lemon flavor to a recipe. And, in addition to being an antioxidant, it has lots of other benefits.
The cake is good. It’s very moist and has a nice texture, and the glaze adds a nice lemony punch. If I were to make it again, I’d probably add a tablespoon more lemon juice to the cake, just because I like lemon desserts really tart.
You can purchase the lemon essential oil (or any other essential oil!) here.
Cake Ingredients
1 cup unsalted butter (2 sticks), at room temperature, plus more for the pan
2 1/2 cups all-purpose flour, spooned and leveled, plus more for the pan
1 teaspoon kosher salt
1/2 teaspoon baking soda
1/2 teaspoon baking powder
3 cups granulated sugar
2 tablespoons finely grated lemon zest
4 tablespoons lemon juice
6 drops lemon essential oil
6 large eggs, at room temperature
1 cup plain full-fat Greek yogurt
Glaze Ingredients
2 tablespoons lemon juice
2 drops lemon essential oil
1 cup confectioners sugar
Preparation
Heat oven to 325° F. Butter and flour a 12-cup Bundt pan. In a medium bowl, whisk together the flour, salt, baking soda, and baking powder.
Using an electric mixer, beat the butter, granulated sugar, and lemon zest on medium-high until light and fluffy, 3 to 4 minutes. Beat in 4 tablespoons of the lemon juice and 6 drops of the lemon essential oil, then the eggs, one at a time, scraping down the sides of the bowl as necessary.
Reduce mixer speed to low. Add half the flour mixture, then the yogurt, and then the remaining flour mixture. Mix just until combined (do not overmix).
Transfer the batter to the prepared pan and bake until a toothpick inserted in the center comes out clean, 65 to 75 minutes. Cool the cake in the pan for 30 minutes, then turn it out onto a wire rack to cool completely.
In a small bowl, whisk together the confectioners sugar, 2 drops of the lemon essential oil, and 1 tablespoon of lemon juice until smooth, adding the remaining lemon juice as necessary to create a thick, but pourable glaze. Pour glaze over cooled cake.
Recipe adapted from Real Simple.
Pão de Queijo (Brazilian Cheese Bread)
 Print This Recipe
When I was in high school, we had to read The Jungle by Upton Sinclair. If you read the book, you can probably guess where this is going. I quickly gave up red meat, and haven’t eaten it to this day. I do eat poultry, but I toy with the idea of going vegetarian.
I bring this up because on one of my first few dates with my ex-boyfriend, he took me to Fogo de Chao, a Brazilian steakhouse where the servers walk around with meat on skewers. (Hmm, dating red flag?) They had one chicken option and of course, it was wrapped in bacon. However, they also have a ridiculously good salad/side bar and pao de queijo, tiny cheese rolls made with tapioca flour. I was probably the restaurant’s favorite customer ever, because I ate mainly veggies and bread; they made a ton of money off me.
Fortunately for me, there’s another Brazilian restaurant, Bossa Nova, in my neighborhood. They also have pao de queijo, and they even have chicken, sans bacon! I’ve gone regularly over the years and recently became obsessed with their cheese bread. So much in fact, that I decided to give a recipe a whirl.
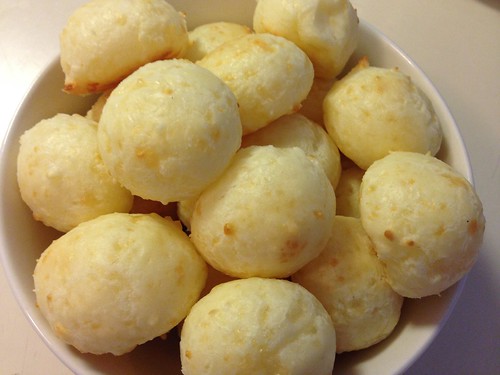
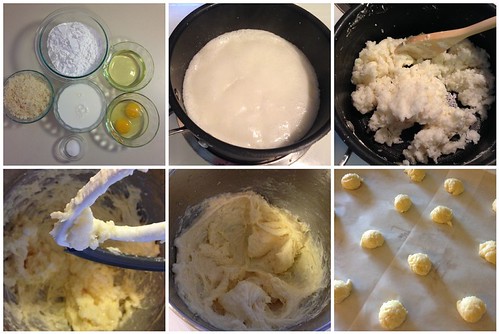
This recipe was super easy, and the puffs were delicious and pretty close to the restaurants’ versions. I probably wouldn’t make these without a stand mixer and cookie scoop, but if you have both of those, you’re good to go!
And, because these are made with tapioca flour, they’re kosher for Passover (and also gluten free). This is a life changer!
Ingredients
1 cup whole milk
1/2 cup vegetable oil
1 teaspoon salt
2 cups (10 ounces) tapioca flour or sour cassava flour
2 eggs
1 1/2 cups shredded Parmesan cheese
Preparation
Preheat the oven to 450°F. Line a baking pan with parchment and set aside.
Combine the milk, oil, and salt in the saucepan. Whisking occasionally, bring to a gentle boil over medium heat. Remove from heat as soon as you see big bubbles coming through the milk.
Add the tapioca flour to the saucepan and stir until the tapioca flour is completely incorporated. The dough will be grainy and gelatinous.
Transfer the dough to the bowl of a stand mixer fitted with a paddle attachment. Beat the dough for a few minutes at medium speed until it smooths out and has cooled enough that you can hold your finger against the dough for several seconds. (If the dough is too warm, there’s a chance your eggs may scramble, so take your time here!)
Whisk the eggs together in a small bowl. With the mixer on medium, beat the eggs into the dough in two additions. Wait until the first addition has been fully incorporated into the dough before adding the second. Scrape down the sides of the bowl as needed.
With the mixer on medium, beat in the cheese until fully incorporated. The resulting dough will be very sticky, stretchy, and soft with a consistency between cake batter and cookie dough.
Using a cookie scoop or tablespoon, scoop rounded portions of the dough into mounds on the parchment-lined baking sheet. Space the mounds an inch or two apart. Dip your scoop in water to prevent sticking.
Transfer the sheet with the puffs to the oven and immediately turn down the heat to 350°F. Bake for 20-30 minutes, until the puffs have puffed, the outsides are dry, and they are just starting to color. Cool briefly and eat. Leftover puffs can be kept in an airtight container for up to a week and re-crisped in a warm oven or toaster oven.
Yields: I used a small OXO cookie scoop and got around three dozen puffs.
Recipe from The Kitchn.
Napa Valley Wine Train
Disclosure: I received two complimentary tickets for the Wine Train. And it was AWESOME.
Last weekend, I had the opportunity to experience the Napa Valley Wine Train, and it was a day like none other! If you haven’t heard of the Wine Train, it’s a train that runs from Napa to St. Helena and is made up of restored, vintage train cars that are absolutely beautiful.
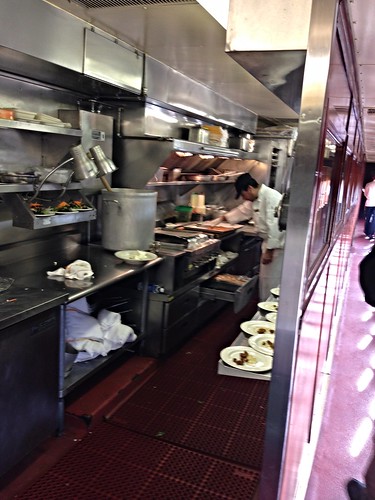
There are different experiences to choose from–you can have lunch, dinner, or a meal plus winery tour. All of the trains include a gourmet meal prepared in the kitchen car (yes, on a moving train, it was quite impressive!), and the winery tours include a private tour and tasting. We decided on lunch and the Castle Winery Tour and it was so much fun!
If you want to enjoy the beautiful views from the train while having a meal, the Vista Dome car is perfect for that as the domed windows allow for amazing views. Additionally, the Vista Dome Premier Train, which runs select weekdays during winter months, is limited to only 56 passengers so you have a very intimate experience. This train debuted just this week, and it’s going to be incredible! When I come back to Napa, that’s the next train I’m taking.
So onto our day–we arrived at the station at 10:30, received a special tour of all of the cars, then promptly boarded the dining car. Seating is arranged before you board, so there’s no worrying about making sure your group is seated together which was really nice.
We perused the menu and selected our courses (lobster bisque for both of us, followed by chicken for me and salmon for my friend, and desserts–chocolate covered tiramisu and creme brulee with blueberries). Everything was delicious and prepared fresh in the kitchen car, which is amazing considering how much the train sways while it’s moving.
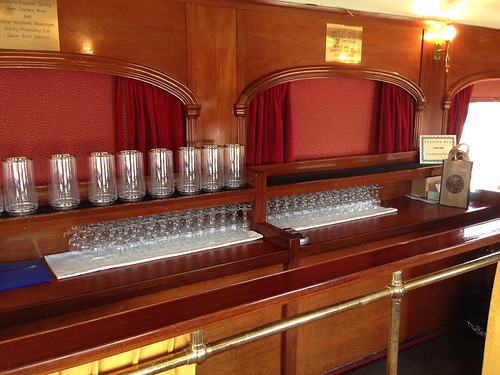
After our soup and entree, we moved into the Lounge Car for dessert and coffee.
If you want to do a wine tasting on the train, there’s also a magnificent wine tasting car.
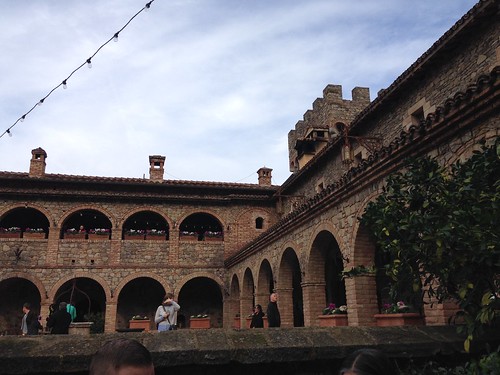
With our bellies full and ready for our tour and tasting, we took a private shuttle to Castello di Amorosa, a gorgeous authentically-styled, 13th century Tuscan castle winery. It took 14 years to build the castle, and it has more than 30 acres of vineyards.

We got to try wine straight from the barrel. Also, our guide, Mark, was awesome.
Following our tour and tasting, we took the shuttle back to the train station and gushed over how fun the day was.
If you’re looking for a special way to celebrate a birthday, anniversary, or bridal shower, or a girls’ weekend, you should consider the Wine Train. I promise you’ll have a fabulous time!
For more information:
Web: Napa Valley Wine Train
Twitter: @WineTrain
Facebook: https://www.facebook.com/WineTrain
Instagram: http://instagram.com/winetrain
