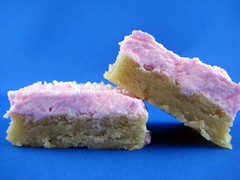
Sugar Cookie Bars
 Print This Recipe
 Did you know last Friday was Sugar Cookie Day? Neither did I, until Thursday afternoon when two coworkers hinted at it. (This is what happens when you’re the coworker with the baking blog.) Not wanting to let anyone down, and always up for trying a new recipe on willing guinea pigs, I decided this was the perfect opportunity to test the sugar cookie bar recipe I’ve had bookmarked for a few months.
I love sugar cookies, but they’re a pain–you have to roll the dough, cut the shapes, then frost each individual cookie. That is why sugar cookie bars are such a brilliant thing! No rolling or shape cutting–simply put the dough on a cookie sheet, bake it, then frost and slice the giant cookie. Simple!
Flavor-wise, I really like the cookie. The frosting was not my favorite (I like a glaze or cream cheese frosting on sugar cookies), but it was a HUGE hit at work, so it may be best to ignore my opinion. My coworkers especially liked the cookie to frosting ratio, which was about 50-50. Overall, these were a tremendous success and I would definitely use this recipe again.
Cookie Ingredients
1 cup butter, at room temperature
2 cups sugar
4 eggs
2 teaspoons vanilla extract
5 cups flour
1 teaspoon salt
1/2 teaspoon baking soda
Cookie Preparation
Preheat oven to 375 degrees. Grease a 13 x 18 inch sheet pan and line with parchment paper.
In a medium bowl, combine the flour, salt and baking soda and set aside. In the bowl of an electric mixture, cream together the butter and sugar until light and fluffy, about 3 minutes on medium high. Add the eggs one at a time, mixing after each. Add the vanilla. Add the flour mixture in 2 addition, mixing until just combined.
Press the cookie dough into the sheet pan, using a greased spatula or parchment paper to spread it evenly. Bake for 10-15 minutes until lightly golden and a toothpick inserted into the middle comes out clean. Cool completely.
Frosting Ingredients
1/2 cup shortening
1/2 cup butter, at room temperature
4 cups confectioners sugar
1 tablespoon vanilla extract
4-5 tablespoons milk
Pinch of salt
Frosting Preparation
In the bowl of an electric mixer, cream together the shortening and butter until combined and smooth. Add the vanilla and salt and mix until combined. Add the confectioners sugar 1 cup at a time, mixing after each addition. Cream together on medium high for about a minute. Add the milk 1 tablespoon at a time, mixing until smooth.
Spread onto cooled cookies. Slice into bars and serve.
Recipe from And Now for Something Completely Delicious.
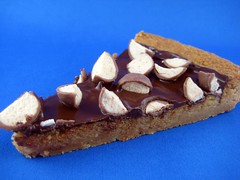
Malted Milk Cookie Tart
 Print This Recipe
 As soon as I saw this recipe I ripped it out of the magazine and stuck it on my fridge. I knew I would love it, and not only because it has a tart shell, chocolate, and malted milk balls, but also because it can be made using only one 1/2-cup measuring cup. I hate doing dishes and love recipes that are simple like that. And yes, I am a dork.
I should also mention that I had a really hard time finding malted milk powder in Los Angeles. After calling all of the major grocery store chains in the city, I finally found the Carnation brand at Gelsons, a more upscale chain. Weird and annoying.
Fortunately, this tart was well worth the time it took to find the malted milk powder. It was super easy to pull together (in fact, I made a second one which I baked in a disposable pie tin), and it tastes amazing. The shell is chewy, not overly sweet, and has a hint of salt, and is the perfect match to the chocolate and malted milk balls on top.
Ingredients
1 1/2 cups all purpose flour
1 cup malted milk powder
1/2 cup sugar
1 teaspoon (scant) coarse kosher salt
1 cup (2 sticks) unsalted butter, cut into 1-inch pieces, room temperature
1/2 cup bittersweet chocolate chips (about 3 ounces; do not exceed 61% cacao)*
1/2 cup malted milk balls, coarsely chopped
Photos of the process.
Preparation
Preheat oven to 325°F. In processor, pulse flour, malted milk powder, sugar, and coarse salt. Add butter; pulse until moist clumps form. Transfer dough to work surface; gather into ball. Press evenly onto bottom of 9-inch-diameter tart pan with removable bottom.
Bake crust until evenly golden brown, about 45 minutes. (Mine was done somewhere around 35-40 minutes. Set the timer for a shorter time and check it regularly.) Scatter chocolate chips over; let stand 5 minutes to soften, then spread melted chocolate over hot crust in well that forms as center sinks. Sprinkle malted milk balls over. Cool completely. Remove tart from pan; cut into wedges.
*Don’t tell anyone, but I didn’t have enough bittersweet so I used some semi-sweet. Shhh.
Recipe from page 50 of July 2010 issue of Bon Appetit.
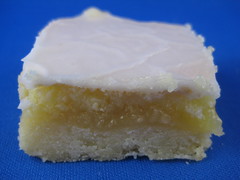
Lemon Bars
 Print This Recipe
 I’ve always loved the look of lemon bars, but the taste, eh, not so much. Whenever lemon bars are on a platter I admire their beauty but always pass on them. In fact, I don’t think I’ve even had a bite of a lemon bar since I was a kid. So when I found myself with a few extra lemons after making lemon cakes for my dentist (I know, the irony), I thought I’d give lemon bars another try. I remembered my friend Jami had mentioned her killer lemon bars before so I asked for her recipe.
When I brought these bars into work I put a note on the container that said “Ugly Lemon Bars” because I wasn’t happy with the look of the sliced bars. I was anxious to taste them and cut them before they were completely set, thus ruining the smooth pretty look of the glaze. Yes, these bars are glazed rather than sprinkled with powdered sugar, which is a plus in my book. I hate powdered sugar on things. Not only does it get all over the place, there is no way to neatly bite into anything with a powdered sugar top. Anyway, I put these bars in the kitchen at 8:00 a.m. and they were gone before noon. And all morning long people came up to me and said, “The Ugly Lemon Bars are soooo good!” There were even a couple of people who said they don’t usually like lemon bars, but they really liked these.
For the record, I still don’t like lemon bars. I’m a huge texture person when it comes to food, and the lemon bar filling I just find odd. Some people may say I am odd, but whatever.
Photos of the process.
Crust Ingredients
2 cups flour
1/2 cup powdered sugar
1 cup unsalted butter
Crust Preparation
Preheat oven to 350F. Mix together the crust ingredients with a pastry blender or fork until crumbly. Press into the bottom of a 9″x13″ pan. Bake for 20-30 minutes or until crust is light golden brown.
While crust is baking, prepare filling.
Filling Ingredients
4 eggs, slightly beaten
2 cups sugar
1/4 cup flour
1 teaspoon baking powder
1/4 cup lemon juice
Filling Preparation
Mix together eggs, sugar, flour, and baking powder thoroughly. You can just stir it all together with a whisk. Add lemon juice and beat well. Pour over warm crust and return to oven. Bake 20-30 minutes. (Don’t let it get too brown.) Cool completely.
Glaze Ingredients
1 cup powdered sugar
2-3 tablespoons lemon juice
Glaze Preparation
Whisk together powdered sugar and lemon juice to make a relatively thin glaze. Drizzle (or spread) over the bars.
Allow glaze to dry, then cut into small squares.
Yields 40-48 small lemon bars.
Recipe from Night Baking.
Bake Sales!
 If you’re in the LA area and love sweets, here’s your opportunity to try some goodies from local bakers and help raise money for two great causes!
The first bake sale is organized by No Cookie Left Behind and is this Sunday, June 13 at Scoops in Hollywood from 2-5. Proceeds go to Share Our Strength, a wonderful organization that raises money to help end childhood hunger. In addition to the bake sale, there will also be raffles and a visit from the Frysmith truck in case you need some savory to go with the sweet. I’m not baking for this event as I’ll be busy making five dozen cupcakes for a friend’s baby shower, but I did participate in the last No Cookie Left Behind bake sale which was a tremendous success; I hope this one raises even more money!
The Eat My Blog bake sale, benefiting the LA Regional Food Bank, will be held on June 19 from 10-4 at Tender Greens (yum!) in West Hollywood. I am contributing chocolate cupcakes with salted caramel frosting and everyone’s favorite brown sugar cookies, so here’s your chance to try out some of my treats. If for whatever reason my baking isn’t enough of a draw, there will be 85 (!!) local bakers and bloggers contributing, including chef and KCRW “Good Food” host Evan Kleiman! Please come on down and support a great cause!
My Favorite Kitchen Things, Part 2 (GelPro mat)
 I know I said I was going to talk about mixing bowls in the next part of this series, but I lied. Instead, I’m going to tell you about my love affair with my GelPro kitchen floor mat. My mom bought one for my parents’ house years ago at Bed, Bath and Beyond, and let me tell you, after baking while standing on my mom’s GelPro mat, the foam mat I bought at Target for my kitchen doesn’t even compare.
Since I’m often at my parents’ house for holidays, much of my time there is spent standing in the kitchen, and the GelPro mat is a necessity. When my parents remodeled their kitchen (double convection oven! island! huge deep sink! additional sink!), they chose stone floors which are definitely not the most comfortable floor to stand on for hours at a time. And to make matters worse, I recently developed sciatica (which I can tell you, is incredibly painful, second only to my post-tonsillectomy pain three years ago) which is aggravated by standing on hard surfaces for long periods of time. When I stand on the GelPro mat, my back and legs are happy!
So, when GelPro offered me a mat (I chose the striated style in khaki) for my own apartment, I was incredibly excited–I have 1970s ceramic tile floors which are not only ugly, but horrid to stand on. Plus, I was on my third foam mat (they get grubby and can’t be wiped clean) and was ready to do anything to avoid another doctor visit and potential MRI.
Now I can’t imagine not having the GelPro mat in my kitchen. In fact, I’m now totally spoiled and wish I had one in front of my stove too. (So what if I have a tiny galley kitchen?) In the meantime, I’m surviving by moving the mat to whichever side of the kitchen I’m currently working in. Sure beats back pain.
Wish you had a GelPro mat too? Here’s your change to win one! Because the folks at GelPro are so nice, they are giving away any 20″ x 36″ GelPro mat to one Nosh With Me reader! To enter, leave a comment telling me how you first discovered my blog, and what, if anything, you’ve made from it.
Contest ends at 11:59 p.m. EST on Sunday, June 13, 2010. One winner will be selected at random shortly thereafter and contacted by email. Please note this contest is only open to residents of the U.S. and Canada.
***Contest is now closed.***