Lemon Pound Cake with Lemon Essential Oil

I love lemon pound cake, and the more lemon juice or zest, the better! So when my friend Leah asked if I was interested in baking something and including an essential oil, I immediately said yes to the lemon oil! The oil is cold-pressed from the rinds of lemons, so it smells absolutely amazing and adds even more lemon flavor to a recipe. And, in addition to being an antioxidant, it has lots of other benefits.
The cake is good. It’s very moist and has a nice texture, and the glaze adds a nice lemony punch. If I were to make it again, I’d probably add a tablespoon more lemon juice to the cake, just because I like lemon desserts really tart.

You can purchase the lemon essential oil (or any other essential oil!) here.
Cake Ingredients
1 cup unsalted butter (2 sticks), at room temperature, plus more for the pan
2 1/2 cups all-purpose flour, spooned and leveled, plus more for the pan
1 teaspoon kosher salt
1/2 teaspoon baking soda
1/2 teaspoon baking powder
3 cups granulated sugar
2 tablespoons finely grated lemon zest
4 tablespoons lemon juice
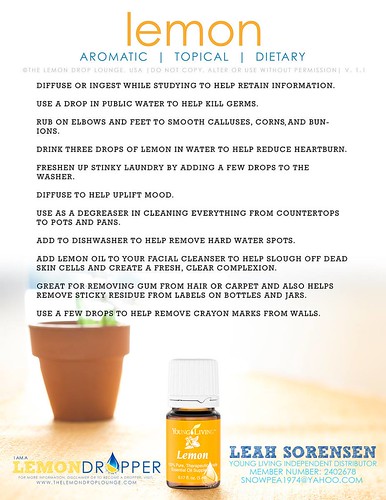
6 drops lemon essential oil
6 large eggs, at room temperature
1 cup plain full-fat Greek yogurt
Glaze Ingredients
2 tablespoons lemon juice
2 drops lemon essential oil
1 cup confectioners sugar
Preparation
Heat oven to 325° F. Butter and flour a 12-cup Bundt pan. In a medium bowl, whisk together the flour, salt, baking soda, and baking powder.
Using an electric mixer, beat the butter, granulated sugar, and lemon zest on medium-high until light and fluffy, 3 to 4 minutes. Beat in 4 tablespoons of the lemon juice and 6 drops of the lemon essential oil, then the eggs, one at a time, scraping down the sides of the bowl as necessary.
Reduce mixer speed to low. Add half the flour mixture, then the yogurt, and then the remaining flour mixture. Mix just until combined (do not overmix).
Transfer the batter to the prepared pan and bake until a toothpick inserted in the center comes out clean, 65 to 75 minutes. Cool the cake in the pan for 30 minutes, then turn it out onto a wire rack to cool completely.
In a small bowl, whisk together the confectioners sugar, 2 drops of the lemon essential oil, and 1 tablespoon of lemon juice until smooth, adding the remaining lemon juice as necessary to create a thick, but pourable glaze. Pour glaze over cooled cake.
Recipe adapted from Real Simple.
Pão de Queijo (Brazilian Cheese Bread)
 Print This Recipe
When I was in high school, we had to read The Jungle by Upton Sinclair. If you read the book, you can probably guess where this is going. I quickly gave up red meat, and haven’t eaten it to this day. I do eat poultry, but I toy with the idea of going vegetarian.
I bring this up because on one of my first few dates with my ex-boyfriend, he took me to Fogo de Chao, a Brazilian steakhouse where the servers walk around with meat on skewers. (Hmm, dating red flag?) They had one chicken option and of course, it was wrapped in bacon. However, they also have a ridiculously good salad/side bar and pao de queijo, tiny cheese rolls made with tapioca flour. I was probably the restaurant’s favorite customer ever, because I ate mainly veggies and bread; they made a ton of money off me.
Fortunately for me, there’s another Brazilian restaurant, Bossa Nova, in my neighborhood. They also have pao de queijo, and they even have chicken, sans bacon! I’ve gone regularly over the years and recently became obsessed with their cheese bread. So much in fact, that I decided to give a recipe a whirl.
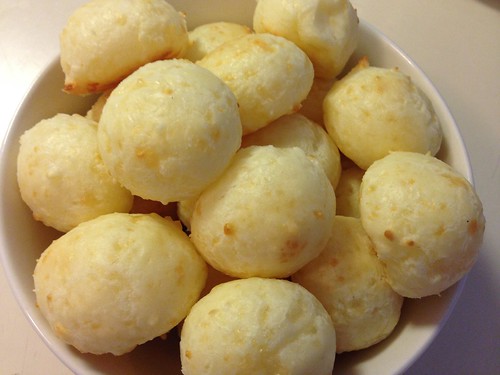
This recipe was super easy, and the puffs were delicious and pretty close to the restaurants’ versions. I probably wouldn’t make these without a stand mixer and cookie scoop, but if you have both of those, you’re good to go!
And, because these are made with tapioca flour, they’re kosher for Passover (and also gluten free). This is a life changer!
Ingredients
1 cup whole milk
1/2 cup vegetable oil
1 teaspoon salt
2 cups (10 ounces) tapioca flour or sour cassava flour
2 eggs
1 1/2 cups shredded Parmesan cheese
Preparation
Preheat the oven to 450°F. Line a baking pan with parchment and set aside.
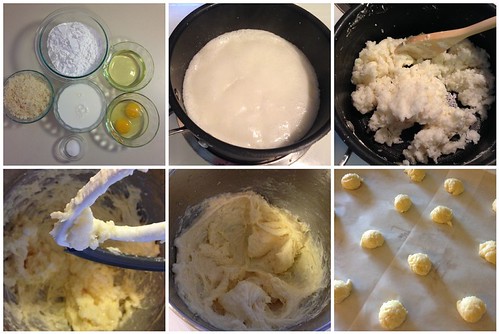
Combine the milk, oil, and salt in the saucepan. Whisking occasionally, bring to a gentle boil over medium heat. Remove from heat as soon as you see big bubbles coming through the milk.
Add the tapioca flour to the saucepan and stir until the tapioca flour is completely incorporated. The dough will be grainy and gelatinous.
Transfer the dough to the bowl of a stand mixer fitted with a paddle attachment. Beat the dough for a few minutes at medium speed until it smooths out and has cooled enough that you can hold your finger against the dough for several seconds. (If the dough is too warm, there’s a chance your eggs may scramble, so take your time here!)
Whisk the eggs together in a small bowl. With the mixer on medium, beat the eggs into the dough in two additions. Wait until the first addition has been fully incorporated into the dough before adding the second. Scrape down the sides of the bowl as needed.
With the mixer on medium, beat in the cheese until fully incorporated. The resulting dough will be very sticky, stretchy, and soft with a consistency between cake batter and cookie dough.
Using a cookie scoop or tablespoon, scoop rounded portions of the dough into mounds on the parchment-lined baking sheet. Space the mounds an inch or two apart. Dip your scoop in water to prevent sticking.
Transfer the sheet with the puffs to the oven and immediately turn down the heat to 350°F. Bake for 20-30 minutes, until the puffs have puffed, the outsides are dry, and they are just starting to color. Cool briefly and eat. Leftover puffs can be kept in an airtight container for up to a week and re-crisped in a warm oven or toaster oven.
Yields: I used a small OXO cookie scoop and got around three dozen puffs.
Recipe from The Kitchn.