Salted Chocolate Chunk Cookies
 Print This Recipe
The minute I saw this recipe pop up on Facebook, I knew I had to make these. Chocolate chunks and sea salt–you can’t go wrong with that! I followed Deb’s instructions, except since I’m super lazy and hate chopping chocolate, I used the Trader Joe’s semi-sweet chocolate chunks. They were the perfect size, and since you’re not using the entire bag, it’s ok if you sneak a few pieces. Also to note: Deb mentioned her dough was really crumbly; mine wasn’t, but if yours is, don’t panic–she swears they will turn out just fine.

While these cookies are soft and delicious (and I managed to eat more than one while they were still warm), I still prefer the David Lebovitz recipe. But if you’re looking for a quicker recipe that doesn’t require chilling dough overnight, this is it!
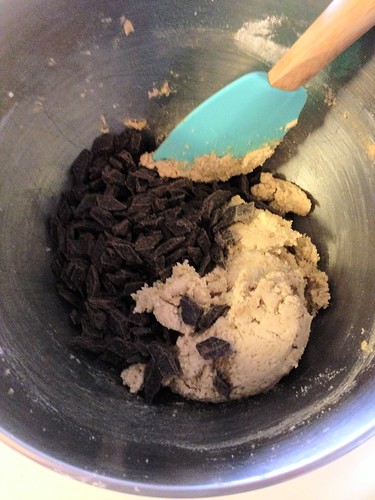
Look at that ratio of chocolate to batter!
Ingredients
1/2 cup (4 ounces or 113 grams) unsalted butter, at room temperature
2 tablespoons (25 grams) granulated sugar
2 tablespoons (25 grams) turbinado sugar (aka Sugar in the Raw; you can use more brown or white if you don’t have this, but the subtle crunch it adds is delightful)
3/4 cup plus 2 tablespoons (165 grams) packed light or dark brown sugar
1 large egg
1 teaspoon vanilla extract
3/4 teaspoon baking soda
Heaped 1/4 teaspoon (or, technically, 1/4 + 1/8 teaspoon) fine sea or table salt
1 3/4 cups (220 grams) all-purpose flour
1/2 pound (225 grams) semi- or bittersweet chocolate, cut into roughly 1/2-inch chunks with a serrated knife (I am lazy and used the Trader Joe’s chunks)
Flaky sea salt, to finish
Preparation
Heat oven to 360°F (180°C) and line a baking sheet with parchment paper or a silicon baking mat.
In a large bowl, cream the butter and sugars together with an electric mixer until very light and fluffy, about 5 minutes. Add egg and vanilla, beating until incorporated, and scraping down the bowl as needed. Beat in salt fine sea or table salt and baking soda until combined, then the flour on a low speed until just mixed. With a spatula, fold/stir in the chocolate chunks.
Scoop cookies into 1 1/2 tablespoon (I used the medium OXO scoop) mounds, spacing them apart on the prepared baking sheet. Sprinkle each with a few flakes of sea salt. Bake for 11 to 12 minutes, until golden on the outside but still very gooey and soft inside. Out of the oven, let rest on baking sheet out of the for 5 minutes before transferring a cooling rack.
Recipe from Smitten Kitchen.
Confetti Sugar Cookies
Print This Recipe
Last month, I made about 300 balls of cookie dough to be baked off while I was in San Diego for my sister’s wedding. I bought personalized stickers and cute little treat boxes off Etsy, and filled them with homemade cookies for all of the guests to take home. Aside from my tried and true brown sugar cookies and speckled shortbread with sea salt, I decided to try something a little more colorful, hence this recipe.
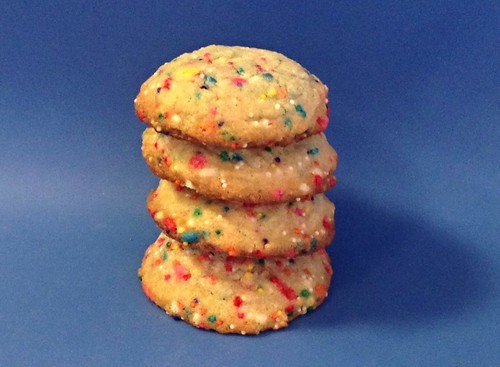
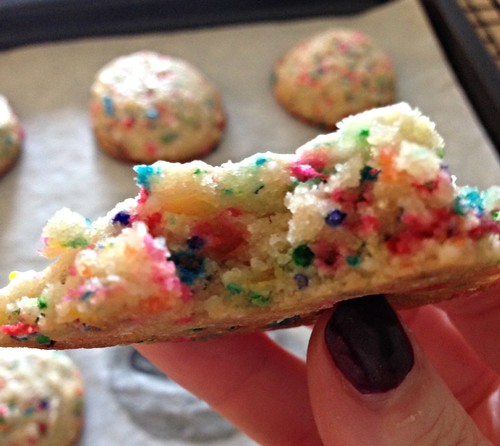
I couldn’t have been any happier! Of the three cookies, I think these were the crowd favorite, and they were so festive and happy, you have to smile just looking at them. Thick and chewy, with a nice crunch from the round (nonpareil) sprinkles, and loads of color from the cylinder sprinkles, these cookies are delicious and pretty!
Ingredients
1 1/3 cup butter, room temperature
1 1/2 cups cups granulated sugar
2 eggs
2 teaspoons vanilla extract
3 1/2 cups flour
1 teaspoon baking powder
1 teaspoon salt
3/4 cup sprinkles
Preparation
Preheat the oven to 350 degrees. Line a baking sheet with parchment paper.
Beat together the butter and sugar until light and fluffy, about 3 minutes with a stand mixer. Beat in the eggs and vanilla until very well combined.
In a small bowl, combine the flour, baking powder, salt, and sprinkles. Gradually add the flour mixture to the butter mixture and mix until combined and the dough comes together.
Use a cookie scoop to drop balls of dough on the prepared baking sheet, about 1-inch apart. Bake for 11 minutes or until edges are turning golden and tops are just slightly underdone looking.
Cool for 10 minutes on the cookie sheet before transferring to a cooling rack to cool completely.
Yields 4-5 dozen.
Recipe from Buns In My Oven.
Gingerbread Men Cookies
I love Christmas cookies, especially gingerbread cookies. But being Jewish, I’ve never had to do one of those marathon baking sessions…until now. This year, I decided to bake and ship cookies as gifts, and gingerbread men were on the list.

This recipe is wonderful–it’s easy, the dough rolled out well, and the taste and texture are both fantastic! I’ll be the first to admit that my decorating skills leave a lot to be desired (and may cause nightmares), but that’s part of their charm, right?
Print This Recipe
Ingredients
3 cups flour
2 teaspoons ground ginger
1 teaspoon cinnamon
1 teaspoon baking soda
1/4 teaspoon ground nutmeg
1/4 teaspoon salt
3/4 cup (1 1/2 sticks) butter, softened
3/4 cup firmly packed brown sugar
1/2 cup molasses
1 egg
1 teaspoon vanilla
Preparation
Mix flour, ginger, cinnamon, baking soda, nutmeg and salt in large bowl. Set aside. Beat butter and brown sugar in large bowl with electric mixer on medium speed until light and fluffy. Add molasses, egg and vanilla; mix well. Gradually beat in flour mixture on low speed until well mixed. Press dough into a thick flat disk. Wrap in plastic wrap. Refrigerate 4 hours or overnight.
Preheat oven to 350°F. Roll out dough to 1/4-inch thickness on lightly floured work surface. Cut into gingerbread men shapes with 5-inch cookie cutter. Place 1 inch apart on ungreased baking sheets.
Bake 8 to 10 minutes or until edges of cookies are set and just begin to brown. Cool on baking sheets 1 to 2 minutes. Remove to wire racks; cool completely. Decorate cooled cookies as desired. Store cookies in airtight container up to 5 days.
Recipe from McCormick.
Sea Salt Caramel Stuffed Snickerdoodles
Print This Recipe
Sea salt + Rolos + snickerdoodle cookies = deliciousness! And when you think about it, how can it possibly not be good? I have to admit, these cookies grew on me–when I tried them right after they cooled, I wasn’t a fan. But the next day, I was all over them!

They are a bit time consuming because you have to roll the dough into a ball around the Rolo, but if you’re a chocolate and caramel fan, it’s worth the work!

Ingredients
1/4 cup granulated sugar, for cinnamon-sugar topping
1 tablespoon McCormick Ground Cinnamon
1 1/2 cups granulated sugar
1 cup (2 sticks) unsalted butter, softened
2 large eggs
1/4 teaspoon vanilla
2 3/4 cups all-purpose flour
2 teaspoons cream of tartar
1 teaspoon baking soda
1/8 teaspoon salt
5 packages of Rolo chocolate-caramel candies (about 35)
Coarse sea salt
Preparation
Preheat oven to 375 degrees F. Line a large baking sheet with parchment paper. For the cinnamon-sugar mixture, combine 1/4 cup sugar and cinnamon in a shallow dish and set aside.
In a large bowl, beat 1 1/2 cups sugar and butter at medium speed until light and fluffy, 3-5 minutes. Beat in eggs one at a time, scraping the sides of the bowl after each addition. Stir in vanilla.
Sift flour, cream of tartar, baking soda, and salt into mixing bowl. With mixer on low, mix until thoroughly combined. Working 1 tablespoon of dough at a time, roll dough into balls, placing a single Rolo inside each ball of dough. Roll dough balls in the cinnamon sugar mixture and place on the baking sheet. Sprinkle with sea salt.
Bake for 7-8 minutes. The cookies should look raw between the cracks and seem underdone. Let cookies cool on baking sheet for 5 minutes, then transfer to a wire rack to cool completely.
Recipe from The Comfort of Cooking.
Salted Caramel Chocolate Chip Cookies
Print This Recipe
Leave it to me to get bronchitis in June. Not only was I incredibly sick and living on matzo ball soup and hot tea for two weeks, I wasn’t baking and had to miss two birthday parties and a wedding. Not fun! But the minute I started feeling better, I found myself in the kitchen whipping up these easy and delicious cookies.
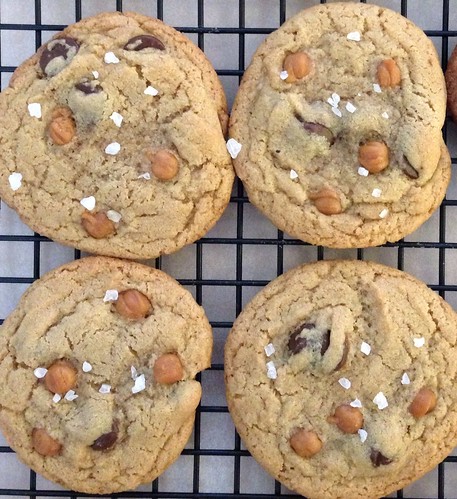
Chocolate chips, caramel pieces, and sea salt–what better combination is there? None, at least in my opinion! Plus, they’re soft and chewy, which is the perfect texture for a chocolate chip cookie. I made the mistake of using the Kraft caramel bits which I had forgotten don’t melt very well in cookies, so when you make these, buy the individually wrapped caramels and cut them into pieces. It’s more work, but will be worth it for the gooey caramel factor!
Ingredients
2 cups + 2 tablespoons all-purpose flour
1/2 teaspoons baking soda
3/4 cup (1 1/2 sticks) salted butter, softened
1 cup light brown sugar
1/2 cup sugar
1 egg, at room temperature
1 egg yolk, at room temperature
2 teaspoons vanilla extract
3/4 cup semi-sweet chocolate chips
16 wrapped caramels, cut into 4 or 5 pieces each
sea salt
Preparation
Preheat oven to 325 degrees F.
Mix the flour and baking soda in a bowl and set aside.
With an electric mixer or stand mixer with a paddle attachment, cream the butter and sugars together. Add the egg, egg yolk, and vanilla and mix well. Gradually add the flour mixture and stir until a dough forms (may take a couple minutes of stirring). Fold in the chocolate chips (do not add the caramels yet). Do not overmix.
Chill dough for at least 30 minutes (or up to 5 days) in the refrigerator. Drop by tablespoonfuls onto ungreased baking sheet. (Keep dough refrigerated between baking batches.) Press a few pieces of caramel onto the tops of the cookies. Bake for 8-10 minutes or until edges are slightly browned. The centers should appear very soft and puffy. Sprinkle each cookie with sea salt while they are warm. Let cool completely.
Recipe from Culinary Chat.