Apple Pie
My dad is a huge fan of Costco’s apple pie. (Hey, don’t knock it till you try it.) He mentioned that recently they changed their recipe, because the pies just don’t taste the same anymore. So, I decided I would find a recipe that had all of the characteristics of the pie he likes (not too tart, not too sweet, double crust, and a gooey inside), and make it myself. While this specific recipe calls for Granny Smith apples, I added some Fujis to cut down on the tartness.
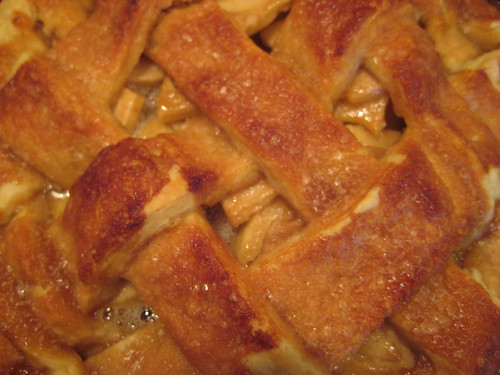
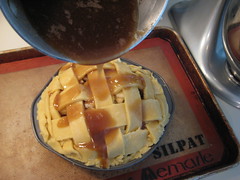 I scoured the Internet and came across a recipe with over 1800 reviews and a five-star rating and knew I had to give it a go. And it is now safe to say this is my family’s new favorite apple pie recipe. The difference between this pie and others I’ve made is in the preparation–the filling ingredients are boiled which creates a gooey goodness that I could easily eat by the spoonful. The filling is then poured onto the pie, over the lattice crust, and the gooey goodness seeps in the cracks and covers the apples. Sounds weird, but trust me, it works.
For the crust, I found a simple shortening recipe (I know some of you are butter purists, sorry) that was easy to work with and baked up flaky. As you can see from my pictures, I lack the technical skill and patience it takes to make a proper lattice crust, but it still tastes good, ugly strips and all. Also, those of you paying close attention to the pictures may have noticed I used a cake pan. I am ashamed to admit I do not own a pie dish, but the 8″ cake pan worked out just fine.
Photos of the process here.
Crust Ingredients (I doubled it so I could make a top and bottom crust.)
1 1/4 cups all-purpose flour
1/4 teaspoon salt
1/2 cup shortening, chilled (I used butter flavor Crisco)
3 tablespoons ice water
Crust Preparation
- Whisk the flour and salt together in a medium size bowl. With a pastry blender, cut in the cold shortening until the mixture resembles coarse crumbs. Drizzle 2 to 3 tablespoons ice water over flour.
- Toss mixture with a fork to moisten, adding more water a few drops at a time until the dough comes together.
- Gently gather dough particles together into a ball. Wrap in plastic wrap, and chill for at least 30 minutes before rolling.
- Roll out dough, and put in a pie plate. Fill with desired filling and bake.
Filling Ingredients
1 recipe pastry for a 9 inch double crust pie
1/2 cup unsalted butter
3 tablespoons all-purpose flour
1/4 cup water
1/2 cup white sugar
1/2 cup packed brown sugar
8 Granny Smith apples – peeled, cored and sliced
Cinnamon (the recipe doesn’t call for it, but I like it in my pies)
Filling Preparation
- Preheat oven to 425 degrees F (220 degrees C). Melt the butter in a saucepan. Stir in flour to form a paste. Add water, white sugar and brown sugar, and bring to a boil. Reduce temperature and let simmer.
- Place the bottom crust in your pan. Fill with apples, mounded slightly. Cover with a lattice work of crust. Gently pour the sugar and butter liquid over the crust. Pour slowly so that it does not run off.
- Bake 15 minutes in the preheated oven. Reduce the temperature to 350 degrees F (175 degrees C). Continue baking for 35 to 45 minutes, until apples are soft.
Crust recipe from All Recipes. Filling recipe from All Recipes.
Vegan Pumpkin Muffins
 Print This Recipe
Last year we spent Thanksgiving in Texas with family, which includes my cousin and his wife whom have been vegan for years. So the challenge was to find a vegan recipe that would not only wow the vegans, but the non-vegans as well.
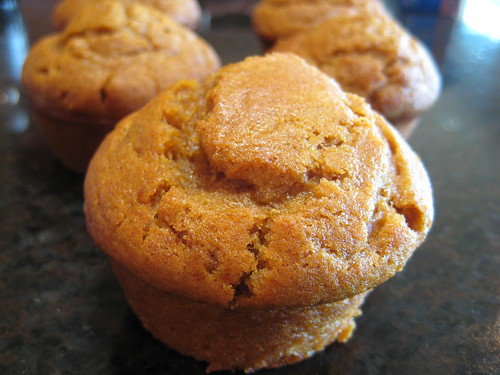
This recipe definitely did just that, and these goodies have now become a regular addition to our Thanksgiving meal. The muffins are soft, moist, and flavorful and the common reaction is, “These are so good, I never would have guessed they were vegan!”
Happy Thanksgiving!
Photos of the process here.
Ingredients
1 3/4 cups flour
1 1/4 cups sugar
1 tablespoon baking powder
1/4 teaspoon salt
1 teaspoon cinnamon
1/2 teaspoon nutmeg
1/2 teaspoon ginger
1/4 teaspoon allspice
1/8 teaspoon ground cloves
1 cup pureed pumpkin (fresh or from a can)
1 tablespoon soy yogurt
1/2 cup soymilk
1/2 cup vegetable oil
2 tablespoons molasses
Preparation
Preheat oven to 400 F. Grease muffin tins with vegetable shortening or spray on oil.
Sift together dry ingredients (flour through cloves). In a separate bowl, wisk together wet ingredients (pumpkin through molasses). Pour wet into dry and combine. Fill muffin tins 2/3 of the way. Bake for 15-20 minutes, until a toothpick inserted in the center comes out clean.
Recipe from Post Punk Kitchen.
Chocolate Chip Cookies
Print This Recipe
 So, there are chocolate chip cookies, then there are these chocolate chip cookies. Throw away your other recipes, because you won’t need them after trying this one. Seriously. This is the best chocolate chip cookie I have ever made, and my coworkers seem to agree. After bringing them into work, I received an email from one of my favorite guinea pigs which said, “OMG, those cookies are good!” in 72-inch purple and pink font. Point taken.
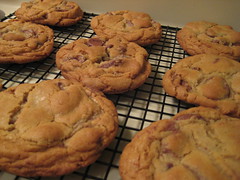
These cookies are crispy on the outside, chewy on the inside, 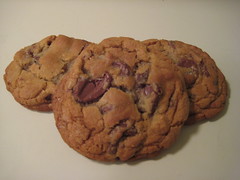 have a rich caramely flavor because of the brown sugar, and the sea salt sprinkled on top is just the perfect addition. And even though they are the size of your head, you still get chocolate in every bite thanks to the fèves (chocolate discs). Because I’m not a fan of dark chocolate (and not ashamed to admit so), I used milk chocolate ones, which I found at Surfas, my local commercial kitchen supply store. (Just search fèves on their website.) These specific chocolates are kinda pricey, so you could always just use the largest chocolate chips you can find and they will still taste just as good.
And finally, just a note that I used all-purpose flour in place of the bread flour.
Ingredients
2 cups minus 2 tablespoons (8 1/2 ounces) cake flour
1 2/3 cups (8 1/2 ounces) bread flour
1 1/4 teaspoons baking soda
1 1/2 teaspoons baking powder
1 1/2 teaspoons coarse salt
2 1/2 sticks (1 1/4 cups) unsalted butter
1 1/4 cups (10 ounces) light brown sugar
1 cup plus 2 tablespoons (8 ounces) granulated sugar
2 large eggs
2 teaspoons natural vanilla extract
1 1/4 pounds bittersweet chocolate disks or fèves, at least 60 percent cacao content (see note)
Sea salt
Preparation
- Sift flours, baking soda, baking powder and salt into a bowl. Set aside.
- Using a mixer fitted with paddle attachment, cream butter and sugars together until very light, about 5 minutes. Add eggs, one at a time, mixing well after each addition. Stir in the vanilla. Reduce speed to low, add dry ingredients and mix until just combined, 5 to 10 seconds. Drop chocolate pieces in and incorporate them without breaking them. Press plastic wrap against dough and refrigerate for 24 to 36 hours. Dough may be used in batches, and can be refrigerated for up to 72 hours.
- When ready to bake, preheat oven to 350 degrees. Line a baking sheet with parchment paper or a nonstick baking mat. Set aside.
- Scoop 6 3 1/2-ounce mounds of dough (the size of generous golf balls) onto baking sheet, making sure to turn horizontally any chocolate pieces that are poking up; it will make for a more attractive cookie. Sprinkle lightly with sea salt and bake until golden brown but still soft, 18 to 20 minutes. Transfer sheet to a wire rack for 10 minutes, then slip cookies onto another rack to cool a bit more. Repeat with remaining dough, or reserve dough, refrigerated, for baking remaining batches the next day. Eat warm, with a big napkin.
Yields 1 1/2 dozen 5-inch cookies.
Recipe from The New York Times, via Smitten Kitchen.
Contest–Win a Silicone Brioche Mold
As I mentioned in the previous post, the folks at KaTom were kind enough to give me 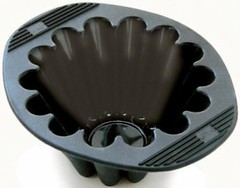 a silicone brioche mold to give away to a lucky Nosh With Me reader!
To enter the contest, simply tell me something–anything–about yourself. I like to know a little about my blog readers.
Contest ends at 11:59 p.m. EST on Sunday, November 23. One winner will be selected at random on Monday, November 24 and contacted by email shortly thereafter. Please note this contest is only open to residents of the U.S. and Canada.
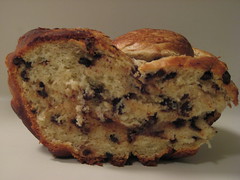
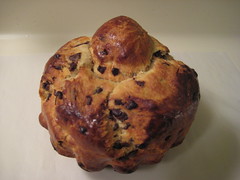
Brioche
Print This Recipe
 When the kind folks at KaTom Restaurant Supply offered to send me a silicone brioche mold to test out, I of course said YES! (Note: They also sent me one to give away, so stay tuned for your chance to win it later this week.) This recipe was a learning experience for me, as I have never a) made a yeast bread or b) baked with a silicone mold.
As you can (or actually, can’t tell from the picture), I chose to do the brioche à tête (think round knob on the top of the loaf); my skills are obviously lacking. Also, I dumped in some mini chocolate chips (1/2 cup? 3/4 cup?), because I figured they couldn’t hurt. I mean, I like challah with chocolate chips, so what’s not to like about brioche with chocolate chips, right?
 The recipe itself wasn’t difficult, there’s just lots of do this and wait, then do this and wait some more. And the recipe instructions were kind of vague at times (e.g., Fold it over several times, making it pliable without becoming too soft. What exactly is too soft?) I wasn’t thrilled with the flavor, but then again, I rarely eat brioche plain, usually it’s used for French toast and drenched in syrup. I’ll probably bring it in to my office guinea pigs tomorrow and see what they say.
On a positive note, the silicone mold is really cool. I didn’t have to grease it, and the brioche just popped right out. And it was super easy to clean–there wasn’t even a crumb, which is always a plus!
Photos of the process here.
– – –
Unrelated to the recipe, Nosh With Me is now on Twitter. Feel free to follow.
Ingredients
3 cups plus 2 tablespoons unbleached all-purpose flour
1 packet active dry yeast
1/4 cup lukewarm water
4 large eggs
2 tablespoons sugar
3/4 teaspoon salt (optional)
1 cup (2 sticks) cold, unsalted butter
Preparation
- Pace 2 cups of the flour, the yeast, water, sugar, and eggs into a bowl and whisk until smooth. Cover the mixture and let it sit for 45 minutes
- Add the remaining 1 cup of flour, the salt, and beat with electric mixer for 45 minutes.
- On a loured surface, flatten the butter into a rectangle about 1/4-inch thick with the heel of your hand or on a rolling pin. Fold it over several times, making it pliable without becoming too soft. Add the butter to the dough and beat until it’s fully incorporated.
- Cover the dough and allow it to rise for 1 hour.
- Turn the dough out onto a lightly floured surface and fold it over several times. Place the dough into a greased bowl, cover, and refrigerate it overnight. The chilled dough will be less sticky.
- Remove the dough from the refrigerator and quickly form it into a round loaf. Place loaf into the brioche pan. Cover with a light cloth and allow it to rise for 2 1/2 to 3 hours, or until it’s doubled and is crowned over.
- Beat the egg yolk with 1 tablespoon of water, and brush all exposed surfaces with the egg wash.
- Bake in a preheated 375 degree F (190 degree C) oven until it’s oglden brown, about 45-50 minutes.
- Remove from the oven and cool it in the pan for 10 minutes. Remove from pan, and cool completely on a rack.
For a classic topknot, cut off an egg sized piece of the dough when it is removed from the refrigerator, allow it to rise separately in a small bowl, and add it to the top of the main loaf just before baking.
Recipe (sans chocolate chips) from the brioche mold packaging.