Baked Doughnuts II
 Print This Recipe
 When I went to Wilton tent sale, the item I was most excited about was the baked doughnut pan. I had made baked doughnuts in the past, but used a recipe where I had to punch out the doughnuts using two different sized cookie cutters. They were a lot of work, and these pans seemed like an easy workaround!
The pans lived up to my expectations and made the doughnuts much easier to make. But while they look super cute, they aren’t very good. In fact, they’re bland, spongy, and just all around eh. Usually when I bring stuff into work, people are constantly saying how good the treat is. With these, everyone said they looked really good. That’s a bad sign!
Ingredients
2 cups cake flour, sifted
3/4 cup granulated sugar
2 tsp baking powder
1/4 tsp ground nutmeg (I omitted this)
1 tsp salt
3/4 cup buttermilk
2 eggs, lightly beaten
2 Tbsp butter, melted
Preparation
Preheat oven to 425°F. Spray the doughnut pan with nonstick cooking spray.
Sift together cake flour, sugar, baking powder, nutmeg, and salt in a large mixing bowl. Whisk in buttermilk, eggs, and butter and beat until just combined. Fill each doughnut cup until about 2/3 full. (Use a pastry bag if you have one; I wish I had made my life easier.)
Bake 7-9 minutes, or until the top of the donuts spring back when touched. Cool in pan for about 4-5 minutes before removing from pan. Complete donuts with either a dusting of powdered sugar, glaze, or cinnamon-sugar topping.
Glaze Ingredients
1/2 cup chocolate chips
2 tablespoons unsalted butter
2 tablespoons corn syrup
2-3 teaspoons hot water
Glaze Preparation
Microwave on 50% power for about 1 minute, stirring in-between, until melted. Stir in 1 teaspoon hot water until the glaze has thickened. Add another teaspoon hot water if the glaze is too thick.
Recipes from Wilton doughnut pan packaging.
Wilton Food Blogger Workshop
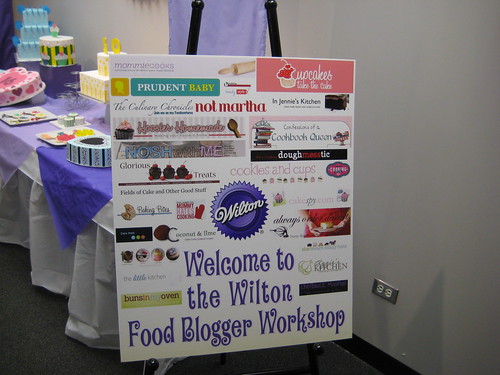
Earlier this week, I was among 20+ food bloggers from around the country flown out to Chicago by Wilton to participate in the Wilton Food Blogger Workshop at their headquarters. Fortunately for me, my good friend Jenn was invited too, because without her, I may have gone crazy dealing with our flight mishaps and the insane Chicago weather. (Humid and 96 degrees on Wednesday, 65 and hail/thunder/lighting/rain/flooding the following day.)
Anyway, I was so flattered to have been chosen to attend and in great company, as you can see by the welcome board:
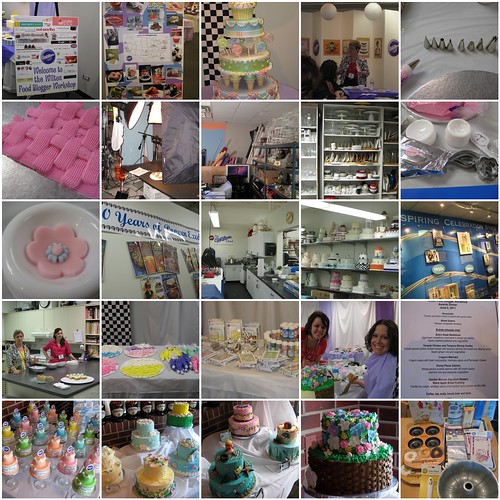
Thursday was packed full of fun! We learned about buttercream, tried out new products, took a tour of the Wilton decorating room and and photo studio, had lunch, learned about fondant (I need desperate help), then finally worked in teams to put our new skills to use in a decorating competition.
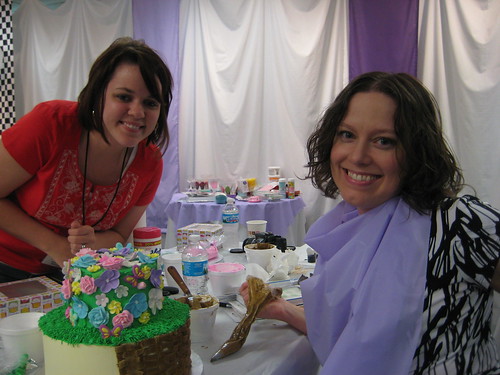
I was teamed up with Kristy of Mommy Hates Cooking and Megan of Not Martha who were both wonderful teammates and didn’t laugh at my lack of decorating skills. Here’s Kristy and Megan hard at work on our basket weave flower bouquet. It’s also one of the rare times none of us had frosting somewhere on our clothes or in our hair.
Following the competition, we boarded a bus and visited the Wilton School and Wilton Enterprises where we saw the history wall and visited the test kitchen (and ate cupcakes, naturally). From there we were pleasantly surprised with vouchers to spend at the Wilton tent sale. I got a ton of stuff, including doughnut pans (recipe coming soon), a bundt pan, bags, gel frosting, vanilla, a pastry wheel, and much more. It was like my birthday and Hanukkah all rolled into one! That night, we had an awards ceremony and dinner as a group, along with the Wilton folks. Each team was awarded a super cute [faux] cake, and our team won “Most Contemporary” for our basket weave bouquet.
Thank you Wilton for inviting me, I had an amazing time!
To see individual pictures, click on the mosaic then click on the links in Flickr.
Compost Cookie Bars (AKA Break Up Cookies)
Print This Recipe
 Note: This post contains a very brief story of my recent breakup as well as what I did and did not eat while in NYC. If you’re only interested in the recipe, skip to here.
I found out on a Thursday that I would be going to NYC for a conference and to see clients the following Monday, so I quickly made a list of restaurants and bakeries I wanted to visit while I was there. On my list was of course Momofuku, home of the Crack Pie I made a while back. I’ve been curious to try their compost cookies which I had heard contain potato chips, pretzels, and much, much more. Seeing as how I’ve enjoyed Ben & Jerry’s Late Night Snack which has chocolate covered potato chips in it, I figured the compost cookies would be a no brainer.
Unfortunately, things then turned south. The day before I was to leave, my boyfriend/guinea pig and I broke up quite unexpectedly, and my body decided to go on a break up diet. The one where you can’t eat, not the one where you eat everything in sight. This did not bode well with my plans to eat my way through New York.
So. What I did not eat: Anything from Momofuku, soft pretzels, warm nuts, black and white cookies, macarons, cupcakes, good pizza. What I did eat bites of: Pizza from the food court at the Javits Center (blech), a lobster sandwich and french fries from The Mermaid Inn (apparently I do like lobster), a bunch of different things including salad, pita and spreads, and chicken from a Greek place called Kefi. Then just when I got hungry enough to eat a full meal, I realized my hotel was literally a foot away from Shake Shack, a place Nicole of Cake & Heels and I had just been talking about the week before. I had the best chicken hot dog (I don’t eat red meat) of my life and the shack sauce I got with the fries was insanely addictive. It’s seriously like crack for french fries.
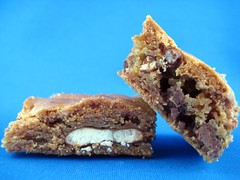
Disappointed I didn’t get to visit Momofuku, and in phase two (wine, sweet, and salty) of the break up diet, I decided to make the compost cookies myself when I got back in town. After reading dozens of blog posts about flat cookies that spread, I figured I’d give them a shot baking them in a pan and slicing them into bars.
My attempt was a success! I brought these cookies to a get together on Saturday and they were gobbled up in no time. The cookie itself is chewy, salty, sweet, and the pretzels gave it a nice crunch. I think the potato chips were a little lost with all of the peanut butter, but the pretzels definitely added some wow factor.
Ingredients
1 cup unsalted butter
1 cup granulated sugar
3/4 cup light brown sugar
1 Tbsp corn syrup
1 tsp vanilla extract
2 large eggs
1 3/4 cups all purpose flour
2 tsp baking powder
1 tsp baking soda
2 tsp Kosher salt
1 1/2 cups your favorite baking ingredients (I used peanut butter cups, peanut butter chips, and chocolate chips)
1 1/2 cups your favorite snack foods (I used potato chips and pretzels)
Preparation
In a stand mixer with the paddle attachment, cream butter, sugars and corn syrup on medium high for two to three minutes until fluffy and pale yellow in color. Scrape down the sides with a spatula.
On a lower speed, add eggs and vanilla to incorporate. Increase mixing speed to medium-high and start a timer for 10 minutes. During this time the sugar granules will fully dissolve, the mixture will become an almost pale white color and your creamed mixture will double in size.
When time is up, on a lower speed, add the flour, baking powder, baking soda and salt. Mix 45 – 60 seconds just until your dough comes together and all remnants of dry ingredients have incorporated. Do not walk away from your mixer during this time or you will risk over mixing the dough. Scrape down the sides of the mixing bowl with a spatula.
On the same low speed, add in the hodgepodge of your favorite baking ingredients and mix for 30 – 45 seconds until they evenly mix into the dough. Add in your favorite snack foods last, paddling again on low speed until they are just incorporated.
Spread batter into 9×13 pan. (I lined my pan with non-stick foil and used an offset spatula to spread.) Bake at 350 and check after 30 minutes. (I can’t remember if mine took 30 or 35 minutes to bake through, sorry!) Let cool then cut into bars.
Recipe adapted from The Amateur Gourmet.