A Few of My Favorite Things
I’m often asked what my favorite kitchen tools are, and with the holidays coming up, I figured some of you may be making a wish list and/or buying for some of your favorite bakers. So, without further ado, here are a few (or several) of my favorite kitchen related things.
Two notes: 1. These are Amazon Affiliate links. If you buy something using these links, I get a few pennies. 2. Hover over the image to get price and more info.
OXO POP Containers
I keep all of my flours, sugars, and anything else for baking in the square containers. They’re easy to clean, stackable, and best of all–OXO has a satisfaction guarantee on their products, so if you ever have any issues with anything, they take care of it easily!

Silicone Pie Shield
No longer will you have to try to fit foil around the outside of your pies. This is the kind of product you buy and think “Why didn’t I invent this?” It’s brilliant.

OXO Cookie Scoops
I have these in three sizes because they are perfect. Everyone always asks how I get all of my cookies the same size–this is how. Plus, it’s designed so well there is no hand cramping or struggling to get the dough out.

Offset Spatula
Not only are these perfect for frosting cupcakes, but I use them to smooth batter in any kind of pan.

Apple Peeler/Corer/Slicer
Want to make peeling/coring/slicing apples a million times easier? Get this. Now. It is seriously one of the best inventions ever.

Tassi
I know, technically not a kitchen product but hear me out. You have a cake to bake and have already styled your hair and don’t want to put it in a ponytail because of the annoying dent you’ll get in the back of your head. Tassi to the rescue! The Tassi pulls your hair away from your face without the dent! Of course, I live alone so there’s no shame in wearing it while I’m baking, but if you have roommates or a significant other you may get strange looks.

Large Silicone Mats
My apartment was built in the Formica counter era, which means anything I spill on the counter seeps into it and stains. So, whenever I’m baking I put a silicon mat on the counter so I can easily wipe everything clean. So simple. Plus, it’s great for rolling pie dough onto or cutting out fondant on.

Silicone Spatulas with Wood Handles
Have you ever melted a spatula? It’s not fun to clean up. Do yourself a favor and get some of these. The wood handles won’t melt and the silicone can be used up to a really high temp so they’re perfect for making candy!

GelPro Floor Mat
If you have back problems or a horrible kitchen floor, these are a must. I have one in my tiny galley kitchen and I don’t know what I did without it.

Trudeau Pinch Bowls
The prep bowls are made of silicone so they’re flexible; they’re great for pouring.

KitchenAid Stand Mixer
Do I really even need to explain how much I love this mixer?


Pie Cookbooks Giveaway
As promised, here’s your chance to win your own copies of these fabulous pie cookbooks from Harvard Common Press. Everything in these cookbooks looks amazing, and the pie crust recipe I used for my salted caramel apple pie was so incredible that everyone who tasted it has been talking about it since Thanksgiving. It’s that good.

To enter to win the cookbooks, tell me what your favorite kind of pie to bake is.
Giveaway ends at 11:59 p.m. EST on Thursday, December 1, 2011. One winner will be selected at random shortly thereafter and contacted by email. Please note this giveaway is only open to residents of the U.S. and Canada.
***Comments are closed.***
Salted Caramel Apple Pie
 Print This Recipe
Remember the super nice folks that sent me the Holiday Cookbooks? Well, they also sent me two amazing pie cookbooks. (Stay tuned for your chance to win them!).

Since I already had a pie recipe in mind, I decided to give one of the many crust recipes in the cookbooks a try. I settled on a butter/shortening recipe, because those are usually may favorite and the easiest to work with for pie crust novices like me. Have I mentioned lattice pie crusts are the bane of my existence? I had pretty much given up on ever making a pretty one.
Well, much to my surprise, this lattice top looks pretty damn nice and my coworkers kept complimenting me on it. The dough was easy to work with which made it easy to lay the strips down without breakage, and the finished product is buttery and flakey thanks to the butter and shortening combination. The salted caramel in the pie was a nice addition, and the lemon juice added just enough tartness to keep it from being cloyingly sweet.
This is definitely a pie I’ll be making again soon!
Crust Ingredients
3 cups all-purpose flour
2 tablespoons sugar
3/4 teaspoon salt
3/4 cup (1 1/2 sticks) cold unsalted butter, cut into 1/4-inch pieces
1/4 cup cold vegetable shortening, cut into pieces
1/2 cup cold water
Crust Preparation
- Put the flour, sugar, and salt in a food processor; pulse several times to mix. Remove the lid and scatter the butter pieces over the dry ingredients. Pulse the machine 5 or 6 times to cut in the butter.
- Remove the lid and fluff the mixture with a fork, lifting it up from the bottom of the bowl. Scatter the shortening pieces over the flour and pulse the machine 6 or 7 times. Remove the lid and fluff the mixture again.
- Drizzle half of the water over the flour mixture and pulse the machine 5 or 6 times. Remove the lid, fluff the pastry, and sprinkle on the rest of the water. Pulse the machine 5 or 6 times more, until the pastry starts to form clumps. Overall, it will look like coarse crumbs. Dump the contents of the processor bowl into a large mixing bowl.
- Test the pastry by squeezing some of it between your fingertips. If it seems a little dry and not quite packable, drizzle a teaspoon or so of cold water over the pastry and work it in with your fingertips. Using your hands, pack the pastry into 2 balls, as you would pack a snowball. Make one ball slightly larger than the other; this will be your bottom crust. Knead each ball once or twice, then flatten the balls into ¾-inch-thick disks on a floured work surface. Wrap the disks in plastic wrap and refrigerate for at least 1 hour before rolling. About 10 minutes before rolling, transfer the pastry to the freezer to make it even firmer.
To mix by hand: Combine the flour, sugar, and salt in a large mixing bowl. Toss well, by hand, to mix. Scatter the butter over the dry ingredients; toss. Using a pastry blender or 2 knives, cut the butter into the flour until it is broken into pieces the size of split peas. Add the shortening and continue to cut until all of the fat is cut into small pieces. Sprinkle half of the water over the dry mixture; toss well with a fork to dampen the mixture. Add the remaining water, 1 tablespoon at a time, and continue to toss and mix, pulling the mixture up from the bottom of the bowl on the upstroke and gently pressing down on the downstroke. Pastry made by hand often needs a bit more water, so add it 1 to 2 teaspoons at a time-if it seems necessary-until the pastry can be packed. Form the pastry into balls, as instructed above, then shape and refrigerate as directed.
Roll the bottom crust to fit a 9-inch pan, and cut the top crust as a lattice, approximately 1-inch in width or as desired. Chill the rolled crust while you prepare the salted caramel and apple filling.
Salted Caramel Ingredients
1 cup white sugar
1/4 cup water
1 stick (1/2 cup) unsalted butter
1/2 cup heavy cream
1 1/2 teaspoon sea salt (recommended: Maldon sea salt flakes)
Salted Caramel Preparation
Cook the sugar and water together over low heat until just dissolved. Add the butter and bring to a slow boil. Continue cooking at a low boil until the mixture turns a deep, golden brown color, almost copper.
Cook’s Note: This process can take awhile depending on the heat source. (They’re not kidding. After 30 minutes I decided to turn the heat up a bit and it still took a while.) Keep an eye on it, if the caramel begins to smoke, you’ve burned it and you’ll have to start over.
Once the mixture has turned a copper color, remove it from the heat and immediately add the heavy cream – the mixture will bubble rapidly and steam – be cautious as the sugar will be very hot.
Whisk the final mixture together well over low heat and sprinkle in the sea salt. Set the caramel aside while you prepare the apple filling.
Filling Ingredients
4 to 6 lemons
5 to 6 medium to large apples (I used Granny Smith)
1/3 cup raw sugar (I used Sugar in the Raw)
2 tablespoons flour
1/4 teaspoon ground cinnamon
1/4 teaspoon ground allspice
1/8 teaspoon freshly grated nutmeg
Filling Preparation
Juice the lemons into a large mixing bowl. Core, peel, and thinly slice the whole apples. Cook’s Note: A mandolin works great for producing very thin slices. (I used the apple peeler/slicer/corer with the handle that you turn–I love it!)
Dredge all the apple slices in the freshly squeezed lemon juice to prevent browning and to add flavor. Set the prepared apples aside.
In a large measuring cup or small mixing bowl, combine the sugar, flour, cinnamon, allspice, and nutmeg. Sprinkle this mixture over the apples in the mixing bowl. Use your hands to gently mix and coat the apple slices.
Assemble the Pie
Preheat the oven to 375 to 400 degrees F (depending on the hotness of your oven).
Gather your rolled pie crust, salted caramel, and apple mixture. Begin by layering 1/3 of the apples in the bottom of the crust so that there are minimal gaps. Pour 1/3 of the caramel over the apples. Add 1/3 of the apples and caramel for a second layer, and then add a third layer of apples, and then the caramel again. Cook’s Note: Save a small portion of the caramel to pour on top once the lattice is assembled.
Assemble the lattice crust and flute the edges of the crust. Pour the last bit of caramel on top. Brush the crust with the beaten egg and lightly sprinkle with raw sugar and sea salt.
Bake the pie on a baking sheet larger than the pie pan for 20 minutes (otherwise the caramel will bubble over and burn on the bottom of your oven). Reduce the oven temperature to 325 to 350 and bake for 25 to 35 minutes. You can test the apples for doneness with a long toothpick or small knife. The apples should be just soft.
Let the pie cool, then slice and enjoy.
Crust recipe from Apple Pie by Ken Haedrich.
Pie recipe adapted from Four and Twenty Blackbirds via Cooking Channel.
Chocolate Chip Marble Bundt Cake
Print This Recipe
 Tomorrow is National Bundt Day, and Food Librarian and the food blogging community are baking more than their fair share of bundts. In fact, this is Food Librarian’s third year of I Like Big Bundts, a time when she bakes a bundt a day for 30 days. That’s a lot of bundts!
Now that I have one or two or three or possibly more bundt pans, I decided I have no excuse for not participating, at least on National Bundt Day. Plus, my coworkers will expect something in the office tomorrow since I took today as a vacation day. I know, they’re demanding. I decided to make something with chocolate chips, and my google search happened to pull up this bundt on my friend Jami’s blog, Night Baking.
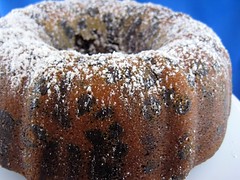
There are a bunch of steps to this bundt–it’s definitely not one of those recipes where you throw everything in one bowl then into the pan, but the end result is a moist, not overly sweet cake. My marbling skills are apparently lacking, so the inside of my cake looks a little sad; somehow I don’t think my coworkers will mind once they take a bite.
Happy National Bundt Day!
Ingredients
2 1/2 cups (17.5 ounces) sugar, divided
1/2 cup (1.5 ounces) cocoa powder
1/4 cup light corn syrup
1/2 cup (4 ounces) hot water
2 1/2 teaspoons vanilla, divided
2 2/3 cups (11 3/8 ounces) flour
2 teaspoons baking powder
1/2 teaspoon salt
2 sticks butter, at room temperature
4 eggs
1 cup (8 ounces) milk
1 cup (6 ounces) chocolate chips
Preparation
Make the chocolate syrup first: in a small saucepan, whisk together 1/2 cup (3.5 ounces) sugar, cocoa powder, corn syrup, and water. Bring just to a simmer, stirring occasionally. Remove from heat and whisk in 1/2 teaspoon of vanilla. Set aside.
Preheat the oven to 350F. Spray or grease and flour a 12-cup bundt pan.
In a medium bowl, whisk together the flour, baking powder, and salt. Use the stand mixer to cream the butter with the remaining 2 cups (14 ounces) sugar until light and fluffy, about two minutes. Beat in the eggs one at a time until thoroughly incorporated. Scrape down the bowl, then beat in the remaining 2 teaspoons vanilla.
Reduce the mixer speed to low. Beat in a third of the flour mixture just until the flour begins to disappear into the batter. Beat in half the milk. Beat in another third of the flour, then the rest of the milk, and then the rest of the flour; mix until smooth. Gently fold in the chocolate chips.
Scoop out a third of the batter into a medium bowl. Whisk in the reserved chocolate syrup and set aside. Spoon another third of the batter into the bundt pan and smooth it with a spatula. Spoon the chocolate batter evenly over it. Pour the remaining vanilla batter over the top. Lightly swirl the batter with a wooden skewer or butter knife to achieve a marbled effect. Making a continuous figure eight motion around the pan works well.
Bake until the cake springs back lightly when touched, about 60-70 minutes. Cool in the pan on a wire rack. Invert the cooled cake onto a cake plate and dust with powdered sugar if desired.
Recipe from Buttercake Bakery via Night Baking.
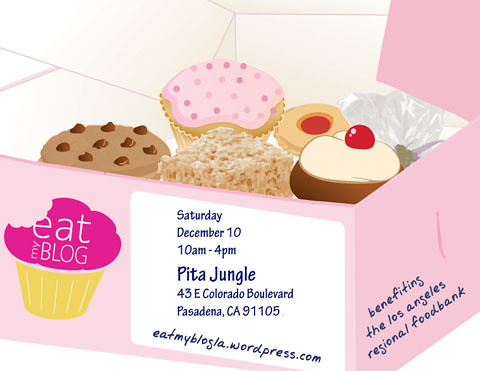
Eat My Blog Bake Sale, Save the Date
Hey LA peeps, it’s that time again so save the date! Eat My Blog 4.0 is being held December 10, 2011 at Pita Jungle in Pasadena. Proceeds go to the Los Angeles Regional Foodbank and I’m making Malted Milk Cookie Tarts so you don’t want to miss out!