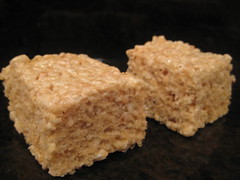
Salted Brown Butter Rice Krispies Treats
 Print This Recipe
 While down in San Diego at my parents’ house for Mother’s Day weekend, I happily discovered the last few Rice Krispies Treats my sister had made sitting on the kitchen counter. Knowing they weren’t going to last long, and in the mood to make something easy yet delicious, I thought it was the perfect opportunity try this adult twist on Rice Krispies Treats.
While these may look like your typical Rice Krispies Treats, they’re definitely not. Sure, they’re sweet and chewy just like the original, but when you’re least expecting it, the salt makes a very welcome appearance. And while I didn’t really notice any difference from browning the butter, I’m not complaining. These treats are yummy!
Photos of the process here.
Ingredients
4 ounces (1/4 pound or 1 stick) unsalted butter, plus extra for the pan
1 10-ounce bag marshmallows
Heaping 1/4 teaspoon coarse sea salt
6 cups Rice Krispies cereal (about half a 12-ounce box)
Preparation
Butter (or coat with non-stick spray) an 8-inch square cake pan with 2-inch sides.
In a large pot, melt butter over medium-low heat. It will melt, then foam, then turn clear golden and finally start to turn brown and smell nutty. Stir frequently, scraping up any bits from the bottom as you do. Don’t take your eyes off the pot as while you may be impatient for it to start browning, the period between the time the butter begins to take on color and the point where it burns is often less than a minute.
As soon as the butter takes on a nutty color, turn the heat off and stir in the marshmallows. The residual heat from the melted butter should be enough to melt them, but if it is not, turn it back on low until the marshmallows are smooth.
Remove the pot from the stove and stir in the salt and cereal together. Quickly spread into prepared pan.
Let cool and cut into squares.
Recipe from Smitten Kitchen.
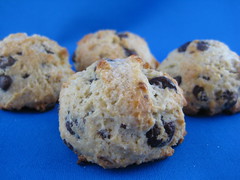
Chocolate Chip Scones
 Print This Recipe
 Last week I made these cupcakes for a friend’s bridal shower and had some buttermilk leftover. Before learning I could freeze buttermilk (who knew?), I made the buttermilk cake squares (yum!), then this scone recipe showed up in my Google Reader (thanks The Food Librarian!) and boom, leftover buttermilk be gone.
I followed the drop scone directions–scoop and bake–rather than shape into a circle and cut into wedges. The scooping was easy and the scones all came out around the same size. The end result was slightly crispy on the outside and soft and moist on the inside. They weren’t as dense as the scones I’m used to, but they were definitely delicious and super easy to make.
Photos of the process here.
Ingredients
2 cups unbleached all-purpose flour
1/3 cup sugar
1 teaspoon baking powder
1/2 teaspoon baking soda
1/2 teaspoon salt
6 tablespoons (3/4 stick) chilled unsalted butter, diced
1 teaspoon (packed) grated lemon peel (I omitted this)
3/4 cup miniature semisweet chocolate chips
3/4 cup chilled buttermilk
1 large egg yolk
1 teaspoon vanilla extract
Glaze: Milk and 2 T sugar
Preparation
- Preheat oven to 400 degrees.
- Line with Silpat or parchment two baking sheets.
- In a large bowl, mix together flour, sugar, baking powder, baking soda and salt.
- In a small mixing bowl or your measuring cup, blend together buttermilk, egg yolk and vanilla. Set aside.
- Cut up cold butter into small pieces and add to the flour mixture. (If you are adding the lemon zest, add here). Using your fingertips, rub in butter until the mixture is sandy or like rice grains. (Mine looked like sand, not rice grains.)
- Mix in the mini chocolate chips
- Pour buttermilk mixture over the flour mixture and mix until dough comes together. Do not overmix. Dough will be moist and soft.
- If you want to make triangle scones, gather the dough and press out on floured surface into an 8-inch round. Cut into 6 wedges.
- If you want to make drop scones, use a scooper to scoop dough onto lined baking sheets.
- Brush tops of scones with milk and sprinkle with sugar.
- Bake at 400 degrees for 18-20 minutes until golden brown. (Mine took around 15 minutes.)
I got about 20 scones using a small cookie scoop.
Recipe from Bon Appétit via The Food Librarian.
Buttermilk Cake Squares
 Print This Recipe
 The recipe calls these squares of deliciousness brownies; however, being the brownie expert I am, and having sampled one or two or three or a lot, I feel the need to clarify: These are not brownies, they are moist, chocolately, yummy pieces of cake topped with frosting you just plop on top of a warm pan of
 brownies cake. I’m guessing they were named brownies because they’re baked in a pan and cut into squares, but don’t let that fool you. These are cake squares. Yes, that is the official terminology.
Did I mention these cake squares are pretty damn good? Like, really good? Especially when they’re still warm? Well, they are. And they’re super easy to make! A few ingredients on the stove, a few in the mixing bowl (including flour and sugar together, weird, I know!), combine everything, then add in two more things. And the frosting? No need to spread and make it look pretty. It kind of glides all over the warm cake all on its own.
Photos of the process here.
Cake Ingredients
2 cups all-purpose flour
2 cups sugar
1 teaspoon baking soda
1/4 teaspoon salt
1 cup water
1 cup butter
1/3 cup unsweetened cocoa powder
2 eggs
1/2 cup buttermilk or sour milk
1-1/2 teaspoon vanilla
Chocolate-Buttermilk Frosting
In a medium saucepan combine 1/4 cup butter, 3 tablespoons unsweetened cocoa powder, and 3 tablespoons buttermilk or sour milk. Bring mixture to boiling. Remove from heat. Add 2-1/4 cups powdered sugar and 1/2 teaspoon vanilla. Beat with an electric mixer on medium to high speed until smooth. If desired, stir in 3/4 cup coarsely chopped pecans.
Cake Preparation
- Preheat oven to 350 degrees F. Grease a 15x10x1-inch or a 13x9x2-inch baking pan; set aside. In a medium bowl, combine flour, sugar, baking soda, and salt; set aside.
- In a medium saucepan combine water, butter, and cocoa powder. Bring mixture just to boiling, stirring constantly. Remove from heat. Add the cocoa mixture to the flour mixture. Beat with an electric mixer on medium speed until combined. Add the eggs, buttermilk, and vanilla. Beat for 1 minute (batter will be thin). Pour batter into prepared baking pan.
- Bake about 25 minutes for the 15x10x1-inch pan, about 35 minutes for the 13x9x2-inch pan, or until a wooden toothpick inserted in the center comes out clean.
- Pour warm Chocolate-Buttermilk Frosting over the warm brownies, spreading evenly. Cool completely in pan on a wire rack. Cut into bars.
The recipe claims to make 24 pieces, but those would be huge squares.
Recipe from Better Homes and Gardens.
Lemon Yogurt Cake
 Print This Recipe
 I had some plain yogurt in my fridge that I needed to use it up, so this recipe was the perfect solution.
I wanted to bring at least one loaf into the office, so I doubled everything and made two loaves, then realized I didn’t buy enough lemons and ended up juicing an orange for the glaze, which worked out just fine. Aside from lots of prep work, the recipe was easy, albeit a little strange–I’ve never heard of folding in oil before!
The cake is good–moist, dense, and definitely very pound cake-ish. Flavor-wise, it is tart and sweet and lemony. I know people raved about this cake, but I liked Ina’s Lemon Cake recipe more. Of course, that one also has way more fat and calories, but who is keeping track, right?
Photos of the process here.
Cake Ingredients
1 1/2 cups all-purpose flour
2 teaspoons baking powder
1/2 teaspoon kosher salt
1 cup plain whole-milk yogurt
1 1/3 cups sugar, divided
3 extra-large eggs
2 teaspoons grated lemon zest (2 lemons)
1/2 teaspoon pure vanilla extract
1/2 cup vegetable oil
1/3 cup freshly squeezed lemon juice
Glaze Ingredients
1 cup confectioners’ sugar
2 tablespoons freshly squeezed lemon juice
Preparation
Preheat the oven to 350 degrees F. Grease an 8 1/2 by 4 1/4 by 2 1/2-inch loaf pan. Line the bottom with parchment paper. Grease and flour the pan.
Sift together the flour, baking powder, and salt into 1 bowl. In another bowl, whisk together the yogurt, 1 cup sugar, the eggs, lemon zest, and vanilla. Slowly whisk the dry ingredients into the wet ingredients. With a rubber spatula, fold the vegetable oil into the batter, making sure it’s all incorporated. Pour the batter into the prepared pan and bake for about 50 minutes, or until a cake tester placed in the center of the loaf comes out clean.
Meanwhile, cook the 1/3 cup lemon juice and remaining 1/3 cup sugar in a small pan until the sugar dissolves and the mixture is clear. Set aside.
When the cake is done, allow it to cool in the pan for 10 minutes. Carefully place on a baking rack over a sheet pan. While the cake is still warm, pour the lemon-sugar mixture over the cake and allow it to soak in. (I poked holes in the cake then brushed on the mixture.) Cool.
For the glaze, combine the confectioners’ sugar and lemon juice and pour over the cake.
Recipe from Food Network/Ina Garten.
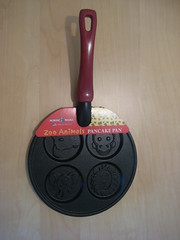
Nordic Ware Zoo Animals Pancake Pan Giveaway
 Last month the awesome people at Challenge Dairy asked if I was interested in receiving another package from them. Yes please! This time, they sent me a bunch of coupons for free butter, an awesome Nordic Ware mini bundt/candy pan, and a zoo animals pancake pan. I was super excited about the mini bundt pan because a few years ago my sister bought me a Nordic Ware pan which I absolutely love. Their products are wonderful. (And look! They also have a coupon on their site as well.)
If you don’t currently own any Nordic Ware, here’s your chance to win some! They’ve teamed up with Challenge Dairy and are having a photo contest where you can enter to win $2500 worth of prizes. I know, that is an insanely awesome prize, and you better believe I am entering!
Now on to my giveaway–since I rarely make pancakes and don’t have a need for zoo animal shaped pancakes, I decided to give the pancake pan (and some free butter coupons) away to one of my lucky readers. To enter, leave a comment telling me about the best dessert you’ve ever eaten–it can be something you made, from a restaurant, whatever. Just share all the delicious details.
Contest ends at 11:59 p.m. EST on Sunday, April 18, 2010. One winner will be selected at random shortly thereafter and contacted by email. Please note this contest is only open to residents of the U.S. and Canada.
***Contest is now closed.***