Pecan Sour Cream Biscuits
 Print This Recipe
This is my first Tuesdays With Dorie post as well as my first attempt at making biscuits, and I think they both went well! (Photos of the process here.)
First things first–I’m not a huge biscuit person. Growing up, the most popular kind of bread in our house was bagels (you can eat anything on a bagel!) so the majority of my biscuit consumption has been limited to the rare times I have ordered something at a restaurant that comes with a biscuit. (Every Father’s Day it’s chicken, waffles, and biscuits at Roscoe’s in Hollywood, but that’s a story for another time.)
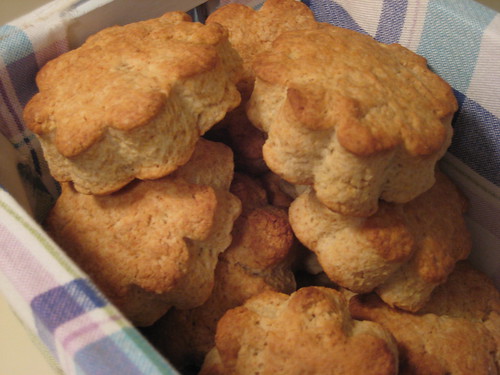
These were good, but not exactly what I imagined them to be. I suppose I should have realized that a biscuit with brown sugar would be a bit sweeter than your everyday biscuit, but for some reason, I ignored that hint. Also, these were definitely a lot denser and browned a lot more than I expected.
And of course, it should be noted I don’t have a round cookie or biscuit cutter, hence the um, flower shaped biscuits. Also, I left out the nuts because nuts in baked goods just ruin everything! (So says my ten-year-old self.)
Ingredients
2 cups all-purpose flour (or 1 3/4 cups all-purpose flour and 1/3 cup cake flour)
1 tablespoon baking powder
1/2 teaspoon salt
1/4 teaspoon baking soda
1/4 cup (packed) light brown sugar
5 tablespoons cold unsalted butter, cut into 10 pieces
1/2 cup cold sour cream
1/4 cold whole milk
1/3 cup finely chopped pecans, preferably toasted
Center a rack in the oven and preheat the oven to 425 degrees F. Get out a sharp 2-inch-diameter biscuit cutter and line a baking sheet with parchment or a silicone mat.
Preparation
Whisk the flour(s), baking powder, salt, and baking soda together in a bow. Stir in the brown sugar, making certain there are no lumps. Drop in the butter and, using your fingers, toss to coat the pieces of butter with flour. Quickly, working with your fingertips (my favorite method) or a pastry blender, cut and rub the butter into the dry ingredients until the mixture is pebbly. You’ll have pea-size pieces, pieces the size of oatmeal flakes and pieces the size of everything in between– and that’s just right.
Stir the sour cream and milk together and pour over the dry ingredients. Grab a fork and gently toss and turn the ingredients together until you’ve got a nice soft dough. Now reach into the bowl with your hands and give the dough a quick gentle kneading– 3 or 4 turns should be just enough to bring everything together. Toss in the pecans and knead 2 to 3 times to incorporate them.
Lightly dust a work surface with flour and turn out the dough. Dust the top of the dough very lightly with flour, pat the dough out with your hands or toll it with a pin until it is about 1/2 inch high. Don’t worry if the dough isn’t completely even– a quick, light touch is more important than accuracy.
Use the biscuit cutter to cut out as many biscuits as you can. Try to cut the biscuits close to one another so you get the most you can out of the first round. By hand or with a small spatula, transfer the biscuits to the baking sheet. Gather together the scraps, working with them as little as possible, pat out to a 1/2-inch thickness and cut as many additional biscuits as you can; transfer these to the sheet. (The biscuits ca be made to this point and frozen on the baking sheet, then wrapped airtight and kept for up to 2 months. Bake without defrosting– just add a couple more minutes to the oven time.)
Bake the biscuits for 14-18 minutes, or until they are tall, puffed and golden brown. Transfer them to a serving basket.
Yields 12 biscuits.
Recipe from Baking: From My Home To Yours by Dorie Greenspan.
Red Velvet Cake Balls
Print This Recipe
Pictures of the process here.
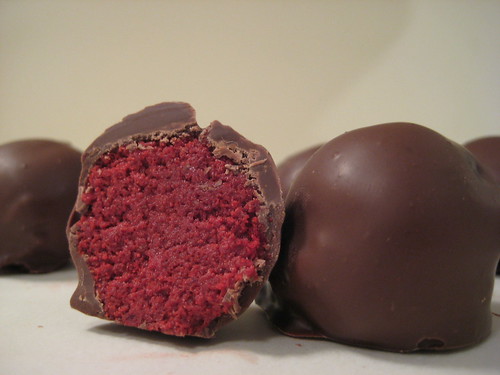
First of all, YUM. Secondly, YUM. Thirdly, YUM.
Now that I’ve gotten that out of the way, I have to tell you that I have a newfound respect for people who dip chocolate by hand. What a pain in the ass. Lesson learned: Spend the extra money and buy the dipping chocolate in the little containers you find next to the strawberries in the produce section of the market. The one I used is called Dolci Frutta Fruit Dip Chocolate and it was delicious and you will thank me for it later! I got it at Pavilions which is owned by Safeway, in case you have a hard time finding it. This chocolate is so cool, once you dip the balls in it (yes, you may giggle) it hardens sorta like Magic Shell (please don’t tell me you’re not old enough to remember Magic Shell) and about five seconds later they are ready to eat.
So, not only are these good, they are easy! And I’ll even admit to using a box mix and canned frosting. I know, for shame! Am I still allowed to have a baking blog? Perhaps we can keep this admission on the down low. Thanks.
Ingredients
1 box red velvet cake mix (cook as directed on box for 13 X 9 cake)
1 can cream cheese frosting (16 oz.)
chocolate for dipping
Preparation
- After cake is cooked and cooled completely, crumble into large bowl.
- Mix thoroughly with 1 can cream cheese frosting. (It may be easier to use fingers to mix together, but be warned it will get messy.)
- Roll mixture into quarter size balls and lay on cookie sheet. (Should make 45-50.)
- Chill for several hours. (You can speed this up by putting in the freezer.)
- Melt chocolate in microwave per directions on package.
- Roll balls in chocolate and lay on wax paper until firm. (Use a spoon to dip and roll in chocolate and then tap off extra.)
My notes:
- I used a small cookie scoop.
- Buy the dipping chocolate!
- I made the balls then refrigerated them overnight (covered with Press N Seal) and dipped them the next day with no problems.
Recipe from Bakerella.
Happy Valentine’s Day
 I know, I’m a little early with the valentine cookies. But since I have no valentine this year (waah), I made cookies to share with my coworkers. And trust me when I say they’re not complaining they get to start stuffing their bellies a day early.
I used my favorite sugar cookie and powdered sugar glaze recipes. Also, notice the cute X and O cookie cutters? I was cleaning out my cupboards and came across them–they were a gift from my mom last year which I almost forgot about! Unfortunately, I couldn’t do too many Xs and Os because they are huge and I would have ended up with only about a dozen cookies.
– – –
And finally, totally unrelated, but if you got here via an article in your local newspaper (hi Judi, I tried to email you but it was returned), would you please send me a link or tell me the name of the paper?
Snickery Squares
Print This Recipe
I suppose I should preface this by saying that this recipe reminded me that while I love caramel, I’m just not a fan of dulce de leche. I know, I know, the pictures look amazing (well, not my photography, but the actual end product). Delicious shortbread, gooey goodness, caramelized nuts, and chocolate all together, the perfect combination! Alas, I’m just not into it. I can’t help but to think dulce de leche is just missing something. Or maybe I’m just used to Snickers bars and their thick, almost too sweet, caramel. Sigh.


(Yes, this was a long process.)
But instead of talking about what I didn’t like, let me tell you about what I did like. The shortbread is a perfect base, and a recipe I know I will use again. The peanuts were my first foray into caramelizing nuts, and while it was stressful (flashbacks of my disastrous peanut brittle/hot sugar blister incident came to mind), it was well worth it. I’ve worked with enough hot sugar now to know a) wear long sleeves, b) use a long spoon/silicone spatula, and c) not dip my finger in a tiny glob of yummy looking caramel that hasn’t yet cooled completely. Come on, like you’ve never done that. Or uh, thought about it.
Anyway, back to the squares. While they’re not my all time favorite, they’re good–thick, oozing of dulce de leche, and not sickeningly sweet. The true test of course, is how long these remain on the counter at my office tomorrow. I’m guessing they’ll be gone well before lunch.
Ingredients
For the Crust
1 cup all-purpose flour
¼ cup sugar
2 tablespoons confectioners’ sugar
¼ teaspoon salt
1 stick (8 tablespoons) unsalted butter, cut into small pieces and chilled
1 large egg yolk, lightly beaten
For the topping
7 ounces bittersweet chocolate, coarsely chopped
½ stick (4 tablespoons) unsalted butter, cut into 8 pieces, at room temperature
For the filling
1/3 cup sugar
3 tablespoons water
1 ½ cups salted peanuts
about 1 ½ cups store-bought dulce de leche
Preparation
Getting Ready: Center a rack in the oven and preheat the oven to 350 degrees F. Butter an 8-inch square pan and put it on a baking sheet.
To make the crust: Toss the flour, sugar, confectioners’ sugar and salt into a food processor and pulse a few times to combine. Toss in the pieces of cold butter and pulse about 12 times, until the mixture looks like coarse meal. Pour the yolk over the ingredients and pulse until the dough forms clumps and curds – stop before the dough comes together in a ball.
Turn the dough into the buttered pan and gently press it evenly across the bottom of the pan. Prick the dough all over with a fork and slide the sheet into the oven.
Bake the crust for 15 to 20 minutes, or until it takes on just a little color around the edges. Transfer the pan to a rack and cool to room temperature before filling.
To make the filling: Have a parchment – or, better yet, a silicone mat-lined baking sheet at the ready, as well as a long-handled wooden spoon (you’ll be cooking sugar that will climb to over 300 degrees F, so you’ll want to keep as far away from it as possible) and a medium (about 2-quart) heavy-bottomed sauce pan.
Put the sugar and water in the saucepan and cook over medium-high heat, stirring, until the sugar dissolves. Keeping the heat fairly high, continue to cook the sugar, without stirring, until it just starts to color. (If sugar splatters onto the sides of the saucepan, wash down the splatters with a pastry brush dipped in cold water.) Toss in the peanuts and immediately start stirring. Keep stirring, to coat the peanuts with the sugar. Within a few minutes, they will be covered with sugar and turn white – keep stirring until the sugar turns back into caramel. When the peanuts are coated with a nice deep amber caramel, remove the pan from the heat and turn the nuts out onto the baking sheet, using the wooden spoon to spread them out as best you can. Cool the nuts to room temperature.
When they are cool enough to handle, separate the nuts or break them into small pieces. Divide the nuts in half. Keep half of the nuts whole or in biggish pieces for the filling, and finely chop the other half for the topping.
Spread the dulce de leche over the shortbread base and sprinkle over the whole candied nuts or the big pieces.
To make the topping: Melt the chocolate in a heatproof bowl set over a saucepan of barely simmering water or in a microwave oven, using a low power setting. Remove the chocolate from the heat and gently stir in the butter, stirring until it is fully blended into the chocolate.
Pour the chocolate over the dulce de leche, smoothing it with a long metal icing spatula, then sprinkle over the finely chopped candied peanuts. Slide the pan into the refrigerator to set the topping, about 20 minutes; if you’d like to serve the squares cold, keep them refrigerated for at least 3 hours before cutting.
Cut into 16 bars, each roughly 2 ½ inches on a side.
My notes:
- I used semi-sweet chocolate.
- I had a really hard time cutting these after refrigerating for only 20 minutes, so I stuck them in the freezer for a few which made them much easier to cut.
Recipe from Baking: From My Home To Yours by Dorie Greenspan.
Double Delicious Cookie Bars
Print This Recipe
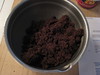
I admit it, the first time I tried this recipe, it failed. And I mean failed. The crust didn’t work, the entire thing was completely stuck to the tin foil, and it was a big gooey mess. Not one to admit defeat so quickly–especially when it comes to a recipe with a mere five ingredients–I gave it another go, this time using a glass dish and no foil. And it worked!
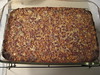
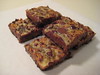
These bars are gooey and sweet and were a hit at the office. Make sure you cut them into tiny squares because a little goes a long way!
Ingredients
1 1/2 cups graham cracker crumbs
1/2 cup (1 stick) butter or margarine
1 (14-ounce) can EAGLE BRAND Sweetened Condensed Milk (NOT evaporated milk)
1 cup (6 ounces) semi-sweet chocolate chips
1 cup (6 ounces) peanut butter-flavored chips
Preparation
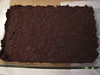
Preheat oven to 350ºF (325ºF for glass dish). In small bowl, combine graham cracker crumbs and butter; mix well. Press crumb mixture firmly on bottom of 13X9-inch baking pan.
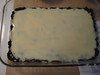
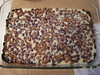
Pour EAGLE BRAND® evenly over crumb mixture. Layer evenly with remaining ingredients; press down firmly with fork.
Bake 25 to 30 minutes or until lightly browned. Cool. Cut into bars. Store leftovers covered at room temperature.
My Notes
I used chocolate graham crackers as Jennifer did over here. And chip wise, I used caramel swirl and chocolate chip, but you can use whatever you have in your pantry.
Recipe from Eagle Brand via Bake or Break.