Peanut Butter Chip Chocolate Cookies
 Print This Recipe
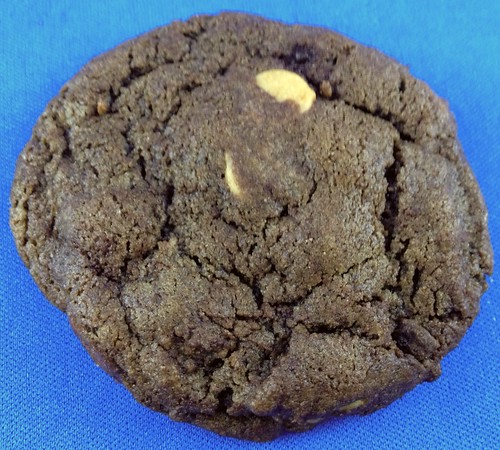
On a whim last weekend, I decided it was time to use the peanut butter chips I’d had in my pantry for who knows how long. A quick Google search of peanut butter chip recipes led me to this one, and within an hour I had quite possibly the best chocolate cookies EVER.
I apparently made my cookies a little smaller than the original recipe called for, because I ended up with closer to three dozen than two, but that was a good thing because I brought all three dozen in to the office and they were gone in no time.
The cookies are soft and chewy with a rich chocolate flavor, and the peanut butter chips added just the right amount of salt and creaminess. They may possibly be the perfect combination of chocolate and peanut butter that you would want in a cookie.
Ingredients
1 cup butter
1 1/2 cups white sugar
2 eggs
2 teaspoons vanilla extract
2 cups all-purpose flour
2/3 cup unsweetened cocoa powder
3/4 teaspoon baking soda
1/2 teaspoon salt
2 cups peanut butter chips
Preparation
Preheat oven to 350 degrees F (175 degrees C). Grease cookie sheets.
In a medium bowl, cream together the butter and sugar. Stir in the eggs and vanilla. Combine the flour, cocoa, baking soda and salt, stir into the creamed mixture. Finally, fold in the peanut butter chips. Drop cookies by heaping teaspoonfuls onto the prepared cookie sheets.
Bake for 8 to 10 minutes in the preheated oven, until set. Cool on wire racks.
Yields 2-3 dozen, depending on size.
Recipe from Allrecipes.com.
Challah
 Print This Recipe
When I’ve gone down to my parents’ house lately, they’ve had the best challah in their bread drawer to nosh on. I suppose I should note here that there are two types of challah eaters: the ones who slice challah and the ones that pull it apart. My family is pull-aparters, so it’s important that the challah have the right texture because inevitably, the innards will be eaten first.
So, a few days before Yom Kippur, I decided I wanted to give another challah recipe a whirl. This time however, instead of looking at the ingredients, I looked at the photos. I wanted bread where the end result looked doughy, soft, and elastic. This photo in this recipe met all of those criteria.
I’m happy to report I have a new favorite challah recipe, and my sister can attest to the amazing texture. This challah is delicious, and the recipe makes two, so you can easily eat one now and freeze the other for later. Plus, only one rise is required, so it’s super easy!
Photos of the process.
Ingredients
1 1/2 cup warm water, divided
1/4 cup plus 2 teaspoons sugar, divided
2 tablespoons active dry yeast
6 cups flour — either all white or half white whole wheat
2 teaspoons salt
1/4 cup mild honey, plus an extra tablespoon for eggwash, if desired
2/3 cup flavorless vegetable or canola oil
4 eggs, plus one yolk for eggwash, if desired
1 pinch ground cardamom, optional
Preparation
Put 1 cup warm water in a small bowl. Add 2 teaspoons of sugar, sprinkle the yeast over top, swirl the bowl just to combine, and leave it to proof for five minutes.
While yeast is proofing, mix flour, salt, 1/4 cup of sugar and cardamom, if using, in a large bowl (or in the bowl of a stand mixer fitted with the paddle attachment.) Stir to incorporate or blend on low speed.
In a medium bowl, mix remaining water, honey, oil, and eggs.
When yeast has finished proofing, add it to the flour, immediately followed by wet ingredients. Mix with a large wooden spoon or on medium-low speed in the mixer, just until combined, about 30 seconds.
Switch to dough hook and begin to knead on low speed, making sure to incorporate what’s at the bottom of the bowl if the dough hook misses it. If kneading by hand, stir using spoon until dough becomes to thick to stir. Empty dough onto well-floured surface and knead by hand. Knead dough until smooth and no longer sticky, adding flour with a light hand as needed, 7-10 minutes.
Split the dough into two equal pieces. Set each in a large oiled bowl, cover both bowls with plastic wrap or a damp towel, and let rise at room temperature until doubled in size. If using white flour, this should take about 2-2.5 hours. If using white whole wheat, it will take closer to 3.5 or 4. Feel free to let the dough rise in the refrigerator overnight instead; if you do this, be sure to set out the dough in plenty of time before shaping, so it can come to room temperature.
Preheat oven to 375.
After the rise, the dough should be soft and pliable. Separate each mound of dough into three equal balls, for a total of six. Roll each ball into a log almost 1-foot long. Braid the logs together to create your loaf. For the nicest-looking braid, do not pinch the top edges of your logs together before braiding; simply place one log over the next and braid until you reach the bottom, then pinch those edges together. Then, flip the unfinished loaf the long way, so that the unfinished edge is now at the bottom and the loaf has been flipped over and upside down. Finish braiding and pinch these edges together. This way, both ends look identical. Tuck the very tips beneath the loaf when braiding is finished. Repeat with second loaf.
Put each loaf on its own silpat-lined baking sheet. If using eggwash, mix yolk with a 1 tablespoon water and 1 tablespoon honey. Brush over loaves.
Bake at 375 degrees for 20-22 minutes, until challot are golden and baked through.
Recipe from Food 52.
Confetti Cookies
 Print This Recipe
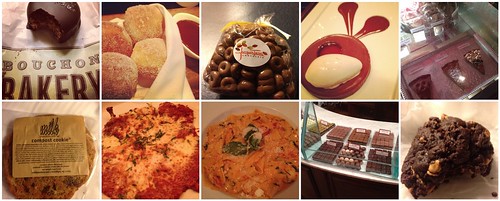
Last month, I was lucky enough to go to NYC for work (and some play). Unlike last year’s trip where I didn’t get to eat anywhere fun, this year I ate more than my fair share.
And I finally got to visit Momofuku Milk Bar! As well as Levain Bakery, Bouchon, and Jacques Torres (chocolate covered Cheerios anyone?). And oh yeah, I also ate lots of carbs at A Voce, Trattoria Dell’Arte (fried artichokes, mmm, thank you Elana!), and Bistro Milano. And while I did not make it to the Halal cart even though it was right across the street from my hotel, it’s fair to say I did not go hungry during my trip.
I may have fallen in love with Momofuku Milk Bar. I came back to LA and told everyone how awesome the bakery is, gushing about the peanut butter pretzel caramel pie, and about their amazing cookbook. Then a few weeks later, the cookbook was MINE. I poured over the pages and immediately decided I had to make the Confetti Cookies because really, what’s better than fun and colorful cookies to bring into the office the first day back after a long weekend?
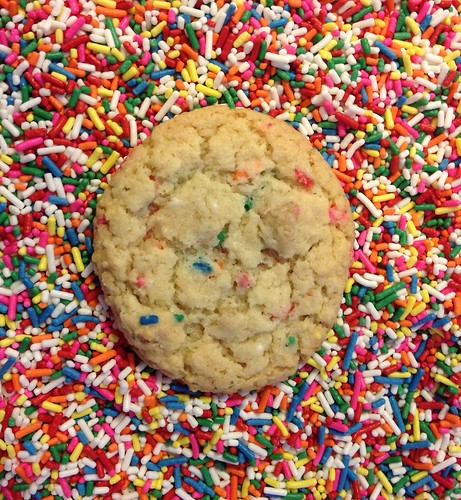
Right out of the oven, these cookies reminded me of the sugar cookies my sister and I used to make with our mom when we were kids. But the next day, they grew on me. They’re chewy inside, with a slight crunch on the outside, and the pieces of the birthday cake crumbs are delicious. While not my favorite cookie ever, they’re fun and were a huge hit at the office.
Side note: this cookbook has weight measurements which are AWESOME. Less dishes to wash and more accurate measurements. If you don’t have a kitchen scale, get one now!
Birthday Cake Crumb Ingredients
100 grams (1/2 cup) granulated sugar
25 grams (1 1/2 tablespoons) packed light brown sugar
90 grams (3/4 cup) cake flour
2 grams (1/2 teaspoon) baking powder
2 grams (1/2 teaspoon) kosher salt
20 grams (2 tablespoons) rainbow sprinkles
40 grams (1/4 cup) grapeseed oil
12 grams (1 tablespoon) clear vanilla extract
Cookie Ingredients
225 grams (16 tablespoons or 2 sticks) butter, at room temperature
300 grams (1 1/2 cups) sugar
50 grams (2 tablespoons) glucose or 25 grams (1 tablespoon) corn syrup
2 eggs
8 grams (2 teaspoons) clear vanilla extract (I found this at Michaels)
400 grams (2 1/2 cups) flour
50 grams (2/3 cup) milk powder
9 grams (2 teaspoons) cream of tartar
6 grams (1 teaspoon) baking soda
5 grams (1 1/4 teaspoons) kosher salt
40 grams (1/4 cup) rainbow sprinkles
1/2 recipe Birthday Cake Crumbs
Birthday Cake Crumb Preparation
Heat the oven to 300°F.
Combine the sugars, flour, baking powder, salt, and sprinkles in the bowl of a stand mixer fitted with the paddle attachment and mix on low speed until well combined.
Add the oil and vanilla and paddle again to distribute. The wet ingredients will act as glue to help the dry ingredients form small clusters; continue paddling until that happens.
Spread the clusters on a parchment or Silpat lined sheet pan. Bake for 20 minutes, breaking them up occasionally. The crumbs should still be slightly moist to the touch; they will dry and harden as they cool.
Let the crumbs cool completely. Stored in an airtight container, the crumbs will keep fresh for 1 week at room temperature or 1 month in the fridge or freezer.
Confetti Cookies Preparation
Combine the butter, sugar, and glucose in the bowl of a stand mixer fitted with the paddle attachment and cream together on medium-high for 2 to 3 minutes. Scrape down the sides of the bowl, add the eggs and vanilla, and beat for 7 to 8 minutes.
Reduce the mixer speed to low and add the flour, milk powder, cream of tartar, baking soda, salt, and rainbow sprinkles. Mix just until the dough comes together, no longer than 1 minute. (Do not walk away from the machine during this step, or you will risk overmixing the dough.) Scrape down the sides of the bowl with a spatula.
Still on low speed, add the birthday cake crumbs and mix in for 30 seconds—-just until they are incorporated.
Using a 2 3/4-ounce ice cream scoop (or a 1/3-cup measure), portion out the dough onto a parchment-lined sheet pan. Pat the tops of the cookie dough domes flat. Wrap the sheet pan tightly in plastic wrap and refrigerate for at least 1 hour, or up to 1 week. Do not bake your cookies from room temperature–they will not bake properly.
Heat the oven to 350°F.
Arrange the chilled dough a minimum of 4 inches apart on parchment or Silpat lined sheet pans. Bake for 18 minutes. The cookies will puff, crackle, and spread. After 18 minutes, they should be very lightly browned on the edges (golden brown on the bottom). The centers will show just the beginning signs of color. Leave the cookies in the oven for an additional minute or so if the colors don’t match and the cookies still seem pale and doughy on the surface.
Cool the cookies completely on the sheet pans before transferring to a plate or an airtight container for storage. At room temp, the cookies will keep fresh for 5 days; in the freezer, they will keep for 1 month.
Recipe from the Momofuku Milk Bar cookbook.
Oreo and Caramel Stuffed Chocolate Chip Cookie Bars
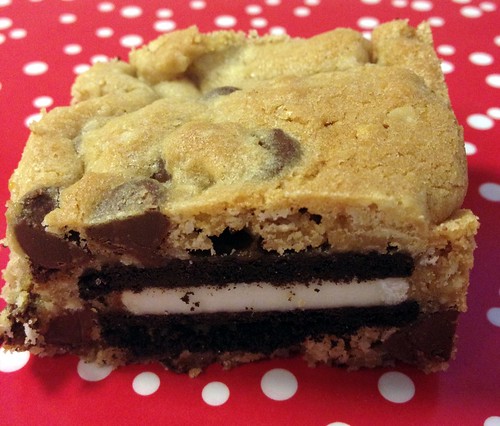
I know. The name alone is enough to give you a heart attack. Picture it–a chocolate chip cookie topped with Double Stuf Oreos, then a layer of caramel, then finally topped with even more chocolate chip cookie.
Insanity. And a huge hit with my coworkers. These cookies were gone well before the end of the day, and there is photographic evidence of everyone’s caloric intake floating around Instagram and Twitter.
They’re crazy sweet, but a fun treat that people will definitely enjoy! Thanks Recipe Girl!
Ingredients
1 cup (2 sticks) unsalted butter, at room temperature
1 cup packed light brown sugar
1/2 cup granulated white sugar
1 large egg
1 large egg yolk
1 tablespoon vanilla extract
2 cups all-purpose flour
1 cup quick-cooking or old-fashioned rolled oats
1 teaspoon baking powder
1 teaspoon baking soda
1 teaspoon kosher salt
2 cups semi-sweet chocolate chips
24 Double Stuf Oreos
1 cup or so of jarred caramel
Preparation
- Preheat oven to 350 degrees F. Spray a 9×13-inch pan with nonstick spray.
- Prepare the cookie dough: Place the butter and sugars in a large bowl. Beat with an electric mixer until smooth and creamy. Add the egg, egg yolk and vanilla. Beat well. Whisk together the flour, oats, baking powder, baking soda and salt in a medium bowl. Add to the butter mixture. Beat until everything is well incorporated, scraping down the sides of the bowl as needed. Stir in the chocolate chips.
- Prepare the bars: Using half of the batch of cookie dough, place dollops into the prepared pan and press with greased hands to press and make an even layer in the bottom of the pan. (I used an offset spatula.)
- Set the Oreos on top of the dough in four rows of 6. Drizzle caramel on top–about 1 cup–over and around the Oreos. Spoon small dollops of the remaining cookie dough on top. Don’t worry if the dollops don’t completely cover the Oreos/caramel. The cookie dough will spread out as you bake it.
- Bake until lightly browned, 20 to 25 minutes. Cool completely (I put the pan in the fridge), then cut into 32 bars.
Recipe from Recipe Girl.
Chocolate Salted Caramel Bars
 Print This Recipe
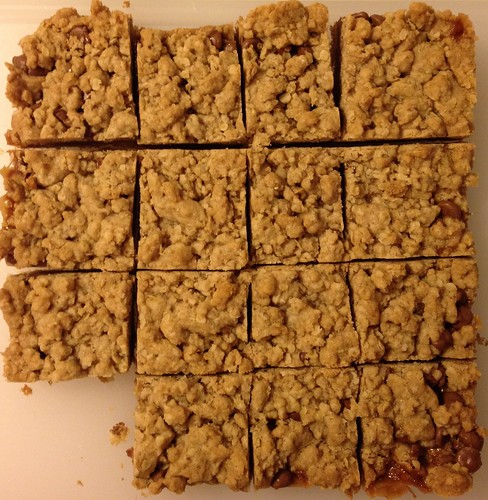
I was going to visit friends with a newborn, and wanted to bring a sweet treat. Since I didn’t have a chance to get the grocery store, I had to make do with what was already in my pantry. This recipe called for the basics. And yes, I usually happen to have jars of salted caramel in pantry–you can blame Trader Joe’s for that.
The reviews for the recipe were all stellar, so I was expecting something pretty amazing and was slightly disappointed. The bar is chewy, but the chocolate definitely overpowers and the caramel isn’t very noticeable. These are OK, but not so incredible that I felt the need to steal half of the pan for myself.
Ingredients
2-1/4 cups all-purpose flour, divided
2 cups quick-cooking oats
1-1/2 cups packed brown sugar
1 teaspoon baking soda
1/2 teaspoon salt
1-1/2 cups cold butter, cubed
2 cups (12 ounces) semisweet chocolate chips
1 jar (12 ounces) salted caramel
Preparation
In a large bowl, combine 2 cups flour, oats, brown sugar, baking soda and salt. Cut in butter until crumbly. Set half aside for topping.
Press the remaining crumb mixture into a greased 13-in. x 9-in. baking pan. Bake at 350° for 15 minutes. Sprinkle with the chocolate chips.
Whisk caramel topping and remaining flour until smooth; drizzle over top. Sprinkle with the reserved crumb mixture. Bake for 18-20 minutes or until golden brown. Cool on a wire rack for 2 hours before cutting. Yield: about 4-1/2 dozen.
Recipe adapted from Taste of Home.
