Chef’s Planet Ovenliner Review
If you’re like me, you’ve baked a gooey pie or cheesy pizza and ended up with goop all over the bottom of your oven. And if you haven’t, you’re incredibly lucky because cleaning that mess up is never an easy task. So when the folks at Chef’s Planet asked if I wanted to try out their nonstick ovenliner, I jumped at the chance.
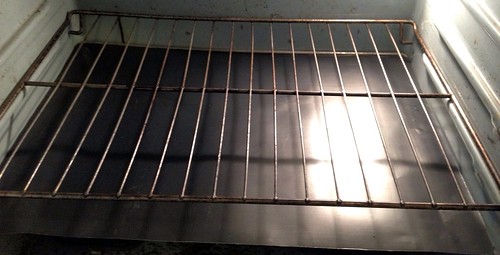
The ovenliner fits all size ovens–if you have a convection oven with a fan in the back, no worries, just cut the liner so it fits. I have an old school electric oven from the 70s and it fit perfectly without needing a trim.
I put the ovenliner to the test when I made a salted caramel apple tart (recipe coming soon) and a pizza, and cleanup was super easy–just remove the ovenliner from the oven and wipe it down. No more burned stuff on the bottom of my oven (which may or may not have sometimes resulted in, you know, smoke). I’m a happy camper!
And speaking of gooey caramel, Chef’s Planet is having a Messy Recipe Contest over on Facebook where they are giving away baking baskets full of cool baking stuff. You can enter until December 31, so check it out!
Disclosure: I received an ovenliner in exchange for this review.
Asian Chicken Wings
 Print This Recipe
And now, something a little different…
People always assume that because I’m a pretty good baker that I’m also a good cook. Sadly, this is far from the truth. I think that the thing that makes me a good baker (loving exact measurements and being very precise) is what makes me a not-so-great cook. I’ll often find myself in the middle of a recipe that isn’t looking quite right, and I’ll call my mom (a wonderful cook) and ask for help. “Taste it,” she’ll tell me. “See what it needs.”
And that’s the part I hate.
With baking, you know that if you mix a specific amount of sugar and butter, you will end up with a fluffy creamed mixture just calling for flour and other dry ingredients. So not true with cooking.
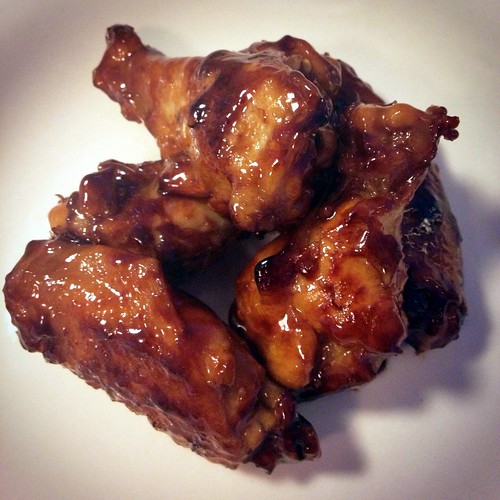
So when I watched The Best Thing I Ever Made and practically salivated over Andrew Zimmern’s chicken wings, I decided to give them a whirl. And the recipe worked. The wings were sticky, spicy, and full of flavor. (And I even tasted the sauce and added more heat.) I can see them being a hit at Superbowl party, Oscar party, or even just on a Wednesday night. So if you’re a bad cook who likes to eat well, try this recipe. You won’t be disappointed!
Ingredients
16 chicken wings
1/3 cup sake
1/3 cup soy sauce
4 tablespoons brown sugar
3 tablespoons mirin
3 tablespoons oyster sauce
4 large thin slices fresh ginger
1 dried hot chile (I used red pepper flakes)
Shaved green onions, for garnish
Sesame seeds, for garnish
Preparation
Place a 14-inch nonstick saute pan over high heat. Add the chicken and dry-sear to lightly brown the chicken. Add the sake, soy sauce, 1/3 cup water, brown sugar, mirin, oyster sauce, ginger, and dried chile and bring to a simmer. Cook, covered, about 12 minutes.
Uncover and simmer until the pan is almost dry, tossing frequently to coat the wings, 10 to 12 minutes. Skim off the fat if you like, and serve, garnishing with scallion shavings and sesame seeds.
Recipe adapted from Andrew Zimmern.
Salted Caramel Bundt Cake
 Print This Recipe
This cake was one of the first things I ever pinned when I started spending time on Pinterest. It was also smack dab in the middle of my salty sweet phase, and there were so many recipes calling my name that this one got forgotten. Until now.
When I finally made it I was reminded of how much I love making bundts. (I think The Food Librarian is on to something.) No slicing into layers, piping, scooping, or time consuming decorating. Simply make a glaze, pour it on, and voila, you have a cake.
While the bundt was in the oven my kitchen smelled amazing, and the smell did not disappointment. The cake was rich, moist, and slightly dense, and the glaze, while U-G-L-Y was the perfect combination of salty and sweet. I brought it into the office the next day and it received rave reviews.
Cake Ingredients
3 cups all-purpose flour
1 1/4 cup granulated sugar
1/2 teaspoon baking powder
1/2 teaspoon baking soda
1/2 teaspoon salt
3 tsp vanilla extract
1 cup Crème fraîche
2 sticks unsalted butter, softened
4 large eggs, room temperature
Cake Preparation
- Preheat oven to 350 degrees. Grease and lightly flour inside a bundt pan.
- Mix flour, baking powder, baking soda and salt in a large bowl and set aside.
- Using a mixer beat the butter until creamy.
- Add the sugar and continue to mix until it becomes light and pale.
- Add the eggs one at a time, then the vanilla extract and Crème fraîche 1/4 cup at a time until it is all mixed in.
- Add flour mixture in small amounts allowing each bit to mix in completely before you add more.
- After all the ingredients are mixed in spoon the batter with a spatula into the bundt mold smoothing it out on top.
Bake for 50 minutes or until a tooth pick inserted in the center comes out clean. - Once the cake is done let it cool for about 12 minutes before you invert it onto another rack letting it cool completely for about an hour.
Caramel Glaze Ingredients
1 cup sugar
3/4 cup heavy cream
1/2 stick of butter
Sea salt
Caramel Glaze Preparation
- Add the butter and sugar together and melt them at the same time while whisking (Medium Heat).
- As the butter and sugar start to dissolve, add the cream and continue to whisk (Medium to High Heat)
- Once it starts to froth and bubble, take it off the heat while still whisking.
- Pour glaze into a glass container or bowl and set aside.
- Once the cake has cooled, pour the caramel over the top covering it in a decorative fashion.
- Sprinkle the top with sea salt and serve!
Recipe adapted from The Tasteful Life.
Chinet Bakeware Giveaway
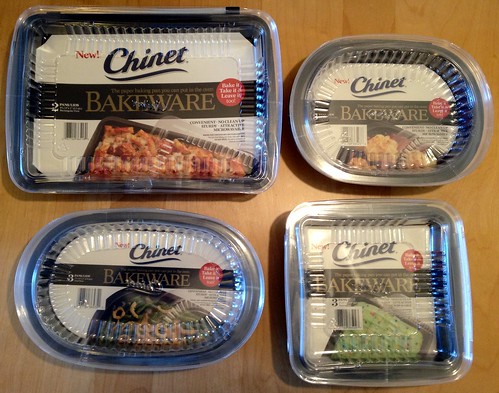
Earlier this year, I was contacted by Chinet and asked to try out their disposable bakeware. I instantly fell in love, and told everyone I knew about it because it is so convenient. The bakeware is made of 90% recycled materials and is non-stick and disposable. And to make it even better, it can go from oven to table to freezer to microwave!
With the holidays coming up, Chinet asked if I wanted to give away another set to which I said, of course! To enter to win, leave a comment stating what holiday dish you think this bakeware would be perfect for.
Chinet provided me with a complete set of Chinet Bakeware and will ship a second set directly to a winner. Giveaway ends at 11:59 p.m. EST on Sunday, November 18, 2012. One winner will be selected at random shortly thereafter and contacted by email. Please note this giveaway is only open to residents of the U.S.
Cornflake Marshmallow Chocolate Chip Cookies
 Print This Recipe
When I was a kid, my mom would often bake Nestle Tollhouse chocolate chips cookies with me and my sister. Sometimes we would throw in Rice Krispies or Cornflakes (we were a non-sugared cereal house) to change things up a bit and give the cookies a slightly different texture. To us, that made the cookies even more special.
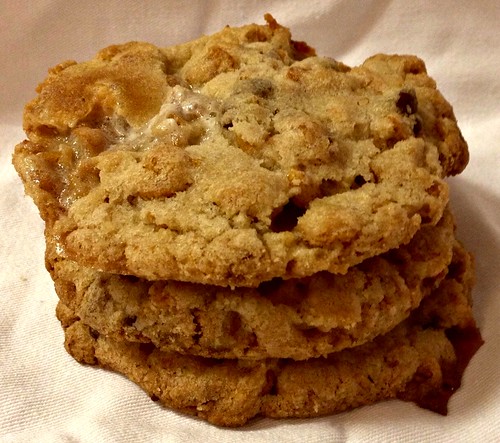
Well, these cookies take my mom’s Rice Krispies chocolate chip cookies to a whole new level. A ridiculous chewy, sweet, hint of salt, bit of crunch type level. In fact, they taste like an ooey-gooey Rice Krispies Treat and chocolate chip cookie mashup. Seriously. These are the kinds of cookies that will make your coworkers hate you. In a good way.
Cornflake Crunch Ingredients
170 g or 1/2 (12-ounce) box cornflakes (5 cups)
40 g or 1/2 cup milk powder
40 g or 3 tablespoons sugar
4 g or 1 teaspoon kosher salt
130 g or 9 tablespoons melted butter
Cornflake Crunch Preparation
Preheat oven to 275 F.
Pour the cornflakes in a medium bowl and crush them with your hands to one-quarter of their original size. Add the milk powder, sugar, and salt and toss to mix. Add the butter and toss to coat. As you toss, the butter will act as glue, binding the dry ingredients to the cereal and creating small clusters.
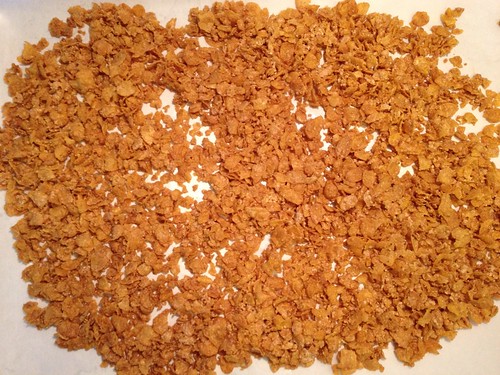
Spread the clusters on a parchment or Silpat lined sheet pan and bake for 20 minutes, at which point they should look toasted, smell buttery, and crunch gently when cooled slightly. (Don’t taste it though, because you may not be able to stop eating it.)
Cool the cornflake crunch completely before storing or using in a recipe. Stored in an airtight container at room temperature, the crunch will keep fresh for 1 week; in the fridge or freezer, it will keep for 1 month.
Cookie Ingredients
225 g or 16 tablespoons (2 sticks)
250 g or 1 1/4 cups granulated sugar
150 g or 2/3 cup packed light-brown sugar
1 large egg
2 g or 1/2 teaspoon vanilla extract
240 g or 1 1/2 cups flour
2 g or 1/2 teaspoon baking powder
1.5 g or 1/4 teaspoon baking soda
5 g or 1 1/4 teaspoons kosher salt
3/4 recipe: 270 g or 3 cups Cornflake Crunch
125 g or 2/3 cup mini chocolate chips
65 g or 1 1/4 cups mini marshmallows
Cookie Preparation
Combine the butter and sugars in the bowl of a stand mixer fitted with the paddle attachment and cream together on medium-high for 2 to 3 minutes. Scrape down the sides of the bowl, add the egg and vanilla, and beat for 7 to 8 minutes.
Reduce the mixer speed to low and add the flour, baking powder, baking soda, and salt. Mix just until the dough comes together, no longer than 1 minute. Scrape down the sides of the bowl with a spatula.
Still on low speed, paddle in the cornflake crunch and mini chocolate chips just until they’re incorporate, no more than 30 to 45 seconds. Stir in the mini marshmallows just until incorporated.
Using an ice cream or cookie scoop (I used my large OXO cookie scoop), portion out the dough onto a parchment lined sheet pan. Pat the tops of the cookie dough domes flat. Wrap the sheet pan tightly in plastic wrap and refrigerate for at least 1 hour, or up to 1week. Do not bake your cookies from temperature–they will not hold their shape.
Heat the oven to 350 F.
Arrange the chilled dough a minimum of 4 inches apart on parchment or Silpat lined sheet pans. Bake for 12-14 minutes. The cookies will puff, crackle, and spread and should be browned on the edges and just beginning to brown toward the center. Leave them in the oven for an additional minute or so if they aren’t and they still seem pale and doughy on the surface.
Cool the cookies completely on the sheet pans before transferring to a plate or to an airtight container for storage. At room temperature, the cookies will keep fresh for 5 days; in the freezer, they will keep for 1 month.
Recipe adapted from the Momofuku Milk Bar cookbook.
