Passover Lemon Chiffon Cake
 Print This Recipe
Regular non-Passover recipes will resume next week.
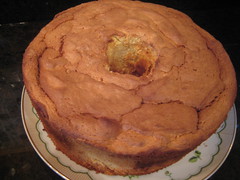 It’s always hard to find Passover desserts that people will take more than one bite of. So when a dessert elicits a YUM response, you know it’s a keeper. This cake is light and airy (it has NINE eggs in it, so it had better be light and airy!) and the flavor is not overly lemony.
The cake came together easily and getting it out of the pan was not a problem. I made this for the first seder, and when we nibbled on it the following day, it tasted even better. I think next year I may add a lemon juice and powdered sugar glaze for the top.
I apologize for the ugly photo, but I was crazy busy making most of this:
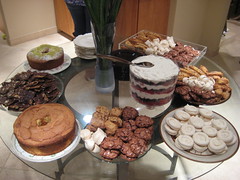
and photos were the last thing on my mind.
Ingredients
1/2 cup lemon juice
4 teaspoons grated lemon zest
2/3 cup matzo cake meal
2/3 cup potato starch
8 egg yolks
1 egg
1 2/3 cups superfine sugar, divided
1/3 cup oil
8 egg whites
1/4 teaspoon salt
Preparation
Heat the oven to 350 degrees.
Place the lemon juice and grated zest in a small saucepan. Bring to a slow boil. Simmer 4 to 5 minutes. (There should be 6 tablespoons of liquid. If not, add water.) Set aside to cool.
Using a fine-mesh strainer, sift together the matzo cake meal and potato starch 4 times. Set aside.
Place the egg yolks and whole egg in the small bowl of an electric mixer. Beat on medium speed until the mixture begins to thicken, about 3 to 4 minutes. Add 1 cup of sugar, 1 tablespoon at a time, and continue beating until the mixture turns pale yellow and is very thick. Scrape the sides of the bowl occasionally. Slowly add the oil in a steady stream.
Reduce the speed to medium-low. Add the cooled lemon juice and zest and beat until blended. Reduce the speed to low. Gradually add the sifted dry ingredients and mix until the batter is smooth. Transfer to a large mixing bowl. Set aside.
Place the egg whites in the large bowl of a mixer. Using clean beaters or the whip attachment, beat the whites on medium speed until frothy. Add the salt. Increase the speed to medium-high and gradually add the remaining 2/3 cup of sugar at the side of the bowl, beating until soft peaks form.
With a rubber spatula, fold 1/4 of the beaten whites into the yolk mixture to lighten it. Fold in the remaining whites.
Gently pour the batter into an ungreased 10-inch angel food pan with a removable bottom. Smooth the top. Bake in the lower 1/3 of the oven until the cake is golden brown and springy to the touch, 45 to 50 minutes.
Remove the cake from the oven and immediately invert the pan onto a wire rack. Cool the cake completely in the pan. Turn the cake upright and run a thin, sharp knife around the sides of the pan, then around the center tube. Lift the cake by the center tube and remove the ring. Run a knife under the cake to loosen the cake from the pan. Invert the cake and remove the tube section.
Transfer the cake to a platter. Store the cake at room temperature under a glass dome or cover with foil up to 1 week.
Recipe from the LA Times.
Baked Doughnuts
Print This Recipe
 As I’ve mentioned before, I’ve never been a huge fan of doughnuts. Growing up, we ate bagels or cereal for breakfast, and doughnuts were thought of as a dessert. When I went away to college, doughnuts were available everywhere, and when I entered the working world, I noticed they were a regular early morning treat. I still never got into them, mainly because of the greasy feeling in my mouth and the heavy blah I would feel in my stomach after eating them.
So when I had a random craving for doughnuts (I blame the Food Network), I Googled recipes for baked doughnuts and figured I’d give them a shot. Since I was trapped in my neighborhood this morning thanks to the LA Marathon, and the weather had finally cooled down enough to even think about turning on my oven, it seemed like the perfect day.
I halved the recipe, because I was afraid I would either a) not like them or b) like them, and didn’t want to have too many, either way. The process was fairly easy although time consuming, as are most yeast breads. The dough came together really nicely using the dough hook, and was easy to work with as well. Since I don’t have a doughnut cutter (oddly, there is such a thing), I used a 2-inch biscuit cutter, and the bottom of a pastry bag tip to cut out the inner circle. You can improvise–before I finally got around to buying a biscuit cutter, I used a drinking glass. Just look around your kitchen, you’ll find circular things.
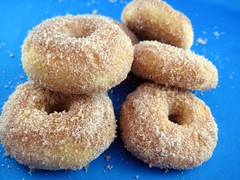
Because I’m used to fried doughnuts, I was expecting these to be heavy, but was happily surprised to discover they were light and airy. The dips in butter and cinnamon-sugar finished the doughnuts off perfectly, and I can definitely see myself bringing these to a friend’s house–for brunch or dessert.

And don’t forget about the bonus doughnut holes. Enjoy!
Photos of the process here.
Ingredients
1 1/3 cups warm milk, 95 to 105 degrees (divided)
1 packet active dry yeast (2 1/4 teaspoons)
2 tablespoons butter
2/3 cup sugar
2 eggs
5 cups all-purpose flour
A pinch or two of nutmeg, freshly grated (I omitted this)
1 teaspoon fine grain sea salt
Cinnamon-Sugar Coating Ingredients
1/2 cup unsalted butter, melted
1 1/2 cups sugar
1 tablespoon cinnamon
Preparation
Place 1/3 cup of the warm milk in the bowl of an electric mixer. Stir in the yeast and set aside for five minutes. Be sure your milk isn’t too hot or it will kill the yeast. Stir the butter and sugar into the remaining cup of warm milk and add it to the yeast mixture. With a fork, stir in the eggs, flour, nutmeg, and salt – just until the flour is incorporated. With the dough hook attachment of your mixer beat the dough for a few minutes at medium speed. If your dough is overly sticky, add flour a few tablespoons at a time. If it’s too dry, add more milk a bit at a time. You want the dough to pull away from the sides of the mixing bowl and eventually become supple and smooth. Turn it out onto a floured counter-top, knead a few times (the dough should be barely sticky), and shape into a ball.
Transfer the dough to a buttered (or oiled) bowl, cover, put in a warm place, and let rise for an hour or until the dough has roughly doubled in size.
Punch down the dough and roll it out 1/2-inch thick on your floured countertop. If you don’t have a doughnut cutter, use a 2-3 inch cookie cutter to stamp out circles. Transfer the circles to a parchment-lined baking sheet and stamp out the smaller inner circles using a smaller cutter. If you cut the inner holes out any earlier, they become distorted when you attempt to move them. Cover with a clean cloth and let rise for another 45 minutes.
Bake in a 375 degree oven until the bottoms are just golden, 8 to 10 minutes–start checking around 8. While the doughnuts are baking, place the butter in a medium bowl. Place the sugar and cinnamon in a separate bowl.
Remove the doughnuts from the oven and let cool for just a minute or two. Dip each one in the melted butter and toss in the sugar bowl.
Makes 1 1/2 – 2 dozen medium doughnuts. (And just as many doughnut holes!)
Recipe from 101 Cookbooks.
Passover Recipes
Passover is coming up soon, so if you’re looking for some tried and true Passover dessert recipes here are some of our seder attendees’ faves: 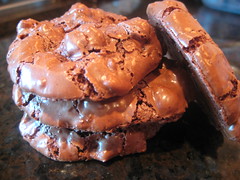
- Flourless Chocolate Walnut Cookies
- Passover Mandelbrot
- Chocolate Chip Meringues
- Flourless Chocolate Cake
- Matzo Brittle
- Apple Crisp
- Brownies
If you have a Passover recipe that you think I should try, please share!
Crack Pie
Print This Recipe
 DISCLAIMER: 1. This pie does not contain actual crack. 2. This picture does not do it justice.
A few weeks ago my friend Carly asked if I had ever tasted Crack Pie. Crack Pie? Huh? She then explained it’s some crazy addictive pie she’d heard about, and that you can buy it online from Momofuku Milk Bar for $44. Yes, $44. As fate would have it, the LA Times ran an article about the pie the very next day, and included in the article was the recipe. I promised Carly I would make it.
So when I got invited to a friend’s Oscar party, I figured hey, why not try out the Crack Pie? Since the recipe yields two pies, I had grand plans of tasting one pie then freezing the rest of it so Carly could try it, and bringing the other pie to the party. Of course, my oven had other plans and I burned the first pie beyond repair (totally my fault, I set the oven incorrectly). This meant I only had one pie to work with and I would be bringing something I had never tasted to the party.
To make matters worse, I read tons of reviews and everyone said their pies were jiggily and oozing and undercooked so I cooked mine about 10 minutes longer, and when I took it out of the oven the top was cracked which made me fairly certain I had over-baked it. However, the final step of the recipe calls for a light (I have a heavy hand apparently) dusting of powdered sugar which covered the ugly exterior and no one was ever the wiser.
Fortunately, it was a huge hit. As in, OMG WHAT IS THIS PIE? IT IS SOOOOOOOOOO GOOD! and I CAN SEE WHY IT’S CALLED CRACK PIE, IT’S BETTER THAN CRACK (if you say so). The pie is crazy rich with a caramel flavor and gooey interior. A slice held its shape for about .23 seconds before becoming an oozy mess on a plate, but no one cared. It was that good. In fact, it’s a “I’d eat this straight from the fridge with a spoon my fingers kind of good. Although, I have to admit, I don’t think I’d pay $44 for it.
Some notes: 1. I hate “scant” measurements and used the weight measurements whenever possible. 2. My pies felt super jiggily after taking them out of the oven at the lower temp, so I baked them for an additional 10 minutes, which I’m still not sure they needed.
Photos of the process here.
Ingredients for Cookie for Crust
2/3 cup plus 1 tablespoon (3 ounces) flour
Scant 1/8 teaspoon baking powder
Scant 1/8 teaspoon baking soda
1/4 teaspoon salt
1/2 cup (1 stick) softened butter
1/3 cup (2 1/2 ounces) light brown sugar
3 tablespoons (1 1/4 ounces) sugar
1 egg
Scant 1 cup (3 1/2 ounces) rolled oats
Preparation
- Heat the oven to 375 degrees.
- In a medium bowl, sift together the flour, baking powder, baking soda and salt.
- In the bowl of a stand mixer using the paddle attachment, or in a large bowl using an electric mixer, beat the butter, brown sugar and sugar until light and fluffy.
- Whisk the egg into the butter mixture until fully incorporated.
- With the mixer running, beat in the flour mixture, a little at a time, until fully combined. Stir in the oats until incorporated.
- Spread the mixture onto a 9-inch-by-13-inch baking sheet and bake until golden brown and set, about 20 minutes. Remove from heat and cool to the touch on a rack. Crumble the cooled cookie to use in the crust.
Ingredients for Crust
Crumbled cookie for crust
1/4 cup (1/2 stick) butter
1 1/2 tablespoons (3/4 ounce) brown sugar
1/8 teaspoon salt
Preparation
Combine the crumbled cookie, butter, brown sugar and salt in a food processor and pulse until evenly combined and blended (a little of the mixture clumped between your fingers should hold together). Divide the crust between 2 (10-inch) pie tins. Press the crust into each shell to form a thin, even layer along the bottom and sides of the tins. Set the prepared crusts aside while you prepare the filling.
Ingredients for Filling
1 1/2 cups (10 1/2 ounces) sugar
3/4 cup plus a scant 3 tablespoons (7 ounces) light brown sugar
1/4 teaspoon salt
1/3 cup plus 1 teaspoon (3/4 ounce) milk powder
1 cup (2 sticks) butter, melted
3/4 cup plus a scant 2 tablespoons heavy cream
1 teaspoon vanilla extract
8 egg yolks
2 prepared crusts
Powdered sugar, garnish
Preparation
- Heat the oven to 350 degrees.
- In a large bowl, whisk together the sugar, brown sugar, salt and milk powder. Whisk in the melted butter, then whisk in the heavy cream and vanilla.
- Gently whisk in the egg yolks, being careful not to add too much air.
- Divide the filling evenly between the 2 prepared pie shells.
- Bake the pies, one at a time, for 15 minutes, then reduce the heat to 325 degrees and bake until the filling is slightly jiggly and golden brown (similar to a pecan pie), about 10 minutes. Remove the pies and cool on a rack.
- Refrigerate the cooled pies until well chilled. The pies are meant to be served cold, and the filling will be gooey. Dust with powdered sugar before serving.
Recipe from the LA Times.