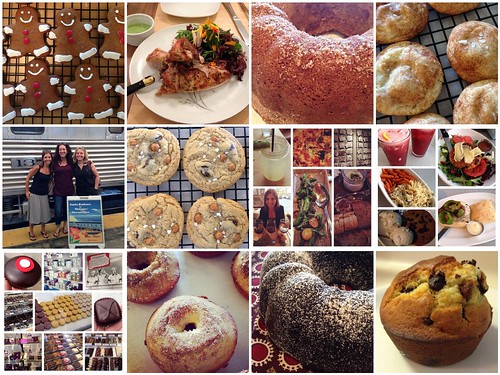
Brookside Chocolate Tasting Kit Giveaway

I was recently contacted by Hershey’s and asked if I wanted to try their new Brookside Chocolate–real fruit juice pieces dipped in dark chocolate. I’m normally not a huge fruit and chocolate fan; I’m that annoying person that bites into every piece of chocolate in those holiday assortments then throws away the other half when it’s fruit filled, but I was pleasantly surprised!

The fruit pieces are chewy and remind me of fruit snacks that I ate as a kid, and the chocolate is rich and has the right amount to complement the fruit without overpowering it. They currently offer three flavors: dark chocolate acai with blueberry, dark chocolate pomegranate, and dark chocolate goji with raspberry (my favorite).

Brookside Tasting Kit Giveaway

Brookside sent me all three flavors (I shared the acai blueberry before I had time to snap a picture) as well as a headband, stemless wine glasses, a candy dish, a cheese board, a cheese knife, (all from Crate & Barrel!) and an AMEX gift card (cheese, crackers, and wine anyone?) so I can relax and indulge with friends.

And because Brookside is so awesome, one of you will win the same tasting kit! Leave a comment below letting us know what flavor you are most excited to try.

For more information about Brookside, visit them on Facebook and Twitter.

Brookside provided me with a tasting kit and will ship a second kit directly to a winner. Giveaway ends at 11:59 p.m. EST on Sunday, January 27, 2013. One winner will be selected at random shortly thereafter and contacted by email. Please note this giveaway is only open to residents of the U.S.

Mini Hershey’s Kisses Peanut Butter Blossoms

Print This Recipe Print This Recipe
For the past decade or so, my friends have hosted a low key new year’s eve party at their house, and each year I bring dessert. (Actually, when you have a baking blog everyone knows you’ll bring dessert, but that’s a whole other story.) Because there are people in different rooms of the house, I tend to make desserts that can be eaten in a bite or two, so guests aren’t awkwardly holding a glass of wine while balancing a plate with a fork.

Untitled

I’ve been wanting to use these mini (like the size of a large chocolate chip…that tiny!) Hershey’s kisses since I found them at the store, and I figured New Year’s Eve was the perfect night for a mini dessert. I don’t think I realized how mini the cookies really would be until I started measuring out the 1/2 teaspoon scoops of dough. One at a time. Then rolling each in sugar. For what seemed like forever.

Dec 31, 2012, 11:14 AM

But the repetitiveness during the preparation was well worth it. These cookies are tiny (about the size of a quarter), soft, and have the perfect chocolate to peanut butter ratio. Not only were they a perfect bite, everyone got a little kiss at midnight. (And my coworkers got the dozens of leftovers.)

Ingredients
1/2 cup shortening
3/4 cup peanut butter
1/3 cup granulated sugar
1/3 cup packed light brown sugar
1 egg
3 tablespoons milk
1 teaspoon vanilla extract
1-1/2 cups all-purpose flour
1/2 teaspoon baking soda
1/2 teaspoon salt
Granulated sugar
Hershey’s Mini Kisses

Preparation
Heat oven to 350°F. Beat shortening and peanut butter with mixer in large bowl until well mixed. Add 1/3 cup granulated sugar and brown sugar; beat well. Add egg, milk and vanilla; beat until fluffy.

Stir together flour, baking soda and salt; gradually add to peanut butter mixture, beating until blended. Shape 1/2 measuring teaspoons of dough into 1/2-inch balls. Roll in granulated sugar; place on ungreased cookie sheet.

Bake 5 to 6 minutes or until set. Immediately press one chocolate into center of each cookie. Remove from cookie sheet to wire rack. Cool completely. Makes about 14 dozen cookies.

Recipe from Hershey’s.

2012 in Pictures

Happy New Year from Nosh With Me!

2012 in Pictures

Cheers to more deliciousness in 2013!

Apple Tart with Salted Caramel

Print This Recipe Print This Recipe

I first made this tart for an office Thanksgiving potluck so I could test it out before Thanksgiving and it was an enormous hit. Everyone was raving about it and asked for the recipe, which is always a good sign. Because it uses packaged puff pastry, it’s pretty much no-fail, and super quick to whip up.

Apple Tart with Salted Caramel

I kept calling the tart “rustic,” because while the quasi-mosaic part is pretty, the crust isn’t exactly picture perfect. But what it lacks in looks, it definitely makes up for in buttery, flaky, salty, sweet goodness.

Note: I used one package of Pepperidge Farm puff pastry and put the two sheets on top of each other before rolling.

Tart Base Ingredients
14-ounce package puff pastry, defrosted in fridge overnight
3 large or 4 medium apples (about 1 1/4 pounds)
2 tablespoons granulated sugar
2 tablespoons unsalted butter, cold, cut into small bits

Salted Caramel Glaze Ingredients
1/4 cup granulated sugar
2 tablespoons unsalted butter (or salted, but then ease up on the sea salt)
1/4 teaspoon flaky sea salt (or half as much table salt)
2 tablespoons heavy cream

Preparation
Heat your oven to 400°F. Line a rimmed baking sheet or jelly roll pan with parchment paper. Ideally you would use a 10×15-inch jelly roll pan. A smaller pan will make a thicker tart (and you might need fewer apples).

Lightly flour your counter and lay out your pastry. Flour the top and gently roll it until it fits inside your baking sheet, and transfer it there. If you roll it bigger, just trim the edges.

Peel, core, and slice the apples. (Deb suggested using a mandolin but I used one of those all in one peel/core/slice thingies and it worked just fine.) Leaving a 1/2-inch border, fan the apples around the tart in slightly overlapping concentric rectangles — each apple should overlap the one before so that only about 3/4-inch of the previous apple will be visible — until you reach the middle. Sprinkle the apples evenly with the first two tablespoons of sugar then dot with the first two tablespoons butter.

Apple Tart with Salted Caramel

Bake for 30 minutes, or until the edges of the tart are brown and the edges of the apples begin to take on some color. If you sliced your apples by hand and they were on the thicker side, you might need a little more baking time to cook them through. The apples should feel soft, but dry to the touch. If your puffed pastry bubbles dramatically in any place during the baking time, simply poke it with a knife or skewer so that it deflates.

Meanwhile, about 20 minutes into the baking time, make your glaze. In a small saucepan over medium-high heat, melt your last 1/4 cup sugar; this will take about 3 minutes. Cook the liquefied sugar to a nice copper color, another minute or two. Off the heat, add the sea salt and butter and stir until the butter melts and is incorporated. Add the heavy cream and return to the stove over medium heat. Cook, stirring constantly, until you have a lovely, bronzed caramel syrup, just another minute, two, tops. Set aside until needed. You may need to briefly rewarm it to thin the caramel before brushing it over the tart.

After the tart has baked, transfer it to a cooling rack, but leave the oven on. Using very short, gentle strokes, and brushing in the direction that the apples fan to mess up their design as little as possible, brush the entire tart, including the exposed pastry, with the salted caramel glaze.

Return the apple tart to the oven for 5 to 10 more minutes, until the caramel glaze bubbles. Let tart cool complete before cutting into 12 squares.

Recipe from Smitten Kitchen.

Chocolate Salted Caramel Tartlets

Print This Recipe Print This Recipe
And…my obsession with chocolate and salted caramel continues.

When David Lebovitz posted this recipe, my aunt immediately asked me if I had been to the bakery (Little Flower Cafe) he referenced in his post. Sadly, I have not, but it is now on my list of places to try. Since David shared a recipe adapted from one of the Little Flower Cafe recipes, I figured making the recipe could tide me over until I find a friend willing to schlep to Pasadena with me.

Chocolate Salted Caramel Tartlets

While these tartlets are a bit time consuming, they are not only delicious but absolutely gorgeous. My coworkers were oohing and aahing over them at the office, and their small size makes it perfectly acceptable to have one or two. Or three. Or um, maybe four. They’re a great party dessert too, because they’re easy to hold and won’t last for more than a few bites. In fact, I may bring these to my friends’ annual New Years Eve party.

Chocolate Salted Caramel Tartlets

Chocolate Dough Ingredients
4 ounces (115g) unsalted butter, at room temperature
1/2 cup (100g) sugar
1 large egg, at room temperature
1/2 teaspoon salt
1/2 teaspoon vanilla extract
3/4 cup (110g) all-purpose flour
1/4 cup (35g) rice flour (or use 1 cup, 140g, all-purpose flour, total)
6 tablespoons (50g) cocoa powder, natural or Dutch-process

Salted Caramel Filling Ingredients
4 ounces (115g) soft, salted butter caramels
3 tablespoons (45ml) heavy cream

Ganache Ingredients
4 1/2 ounces (130g) bittersweet chocolate, chopped
6 tablespoons (90ml) heavy cream
flaky sea salt

Preparation

  1. To make the tartlet dough, beat the butter and the sugar just until smooth in the stand mixer with the paddle attachment, or by hand. Add the egg, salt, and vanilla, and beat until smooth. In a separate bowl, whisk together the all-purpose flour, rice flour, and cocoa powder, then mix it into the creamed butter.
  2. Butter the indentations of two mini-muffin tins with 12 places in each, or one mini-muffin tin with 24 places. Pinch off pieces of dough and roll each into a 3/4-inch (2cm) ball. As you work, put the dough balls in the indentations of the muffin tins. Take your thumb and press the dough down in the center of each indentation, then use your thumb to press the dough up the sides. (If the dough is sticky, dampen your thumb very lightly with water or oil.) Freeze the pans of dough for 20 minutes.
  3. Preheat the oven to 350ºF (180ºC).
  4. Bake the tartlet shells for 8 to 10 minutes, until the dough appear dry and cooked. Remove from oven and use the handle of a wooden spoon to widen and smooth the inside of the little tartlet shells, pressing the dough that’s puffed up somewhat firmly against the sides. Let cool completely, then remove the tartlet shells from the muffin tins – the tip of a paring knife might be needed to help aid them out – and set them on a wire cooling rack.
  5. Make the caramel filling by warming the cream with the caramels in a small saucepan over low heat, stirring, until the caramels are melted and the mixture is smooth. Divide the caramel into each of the tartlet shells.
  6. Make the chocolate ganache by heating the cream in a small saucepan. Remove from heat and add the chopped chocolate. Let it sit for a minute, then whisk the chocolate into the cream until the mixture is smooth.
  7. Top each tartlet with some of the ganache and take a butter knife or small metal spatula and swipe off the excess. Sprinkle each tartlet with a few grains of sea salt.

Recipe by David Lebovitz.

« Previous PageNext Page »